


Summary
The 2/4th Machine Gun Battalion was an Australian Army unit raised for service with the all volunteer Second Australian Imperial Force (2nd AIF) during the Second World War. Formed in late 1940 as part of the 8th Division, the battalion was established to provide direct fire support to the division's infantry brigades. It was the fourth, and last, such unit raised within the 2nd AIF. The unit's personnel were largely drawn from the state of Western Australia and after formation, the battalion concentrated near Perth for basic individual training before moving to the Adelaide Hills to complete more advance manoeuvres.
| 2/4th Machine Gun Battalion | |
|---|---|
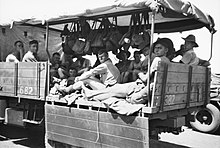 Troops from the 2/4th travel by truck from Alice Springs to Birdum, October 1941 | |
| Active | 1940–1942 |
| Country | Australia |
| Branch | Australian Army |
| Type | Infantry |
| Role | Direct fire support |
| Size | ~800–900 personnel |
| Part of | 8th Division |
| Engagements | Second World War |
| Insignia | |
| Unit colour patch |  |
In late 1941, amidst concerns of war in the Pacific, the unit was deployed north to Darwin in the Northern Territory, where they undertook garrison duties in the weeks following Japan's entry into the war. Following Japanese landings in Malaya, the 2/4th embarked from Darwin and were transferred to Malaya, arriving in Singapore in the final days of the fighting on the peninsula. In the wake of the withdrawal of British and Commonwealth forces to the island, the battalion was hastily deployed in support of the two Australian brigades—the 22nd and 27th Brigades—in the north-western sector of the island. During the initial Japanese landing, elements of the battalion were heavily engaged around the landing beaches but they were outnumbered and over the course of the week the defenders were pushed back towards the centre of the island, towards the city of Singapore. They suffered heavy casualties during this time, before subsequently becoming prisoners of war after the fall of Singapore.
Meanwhile, a detachment of about 100 men from the battalion, who had been left behind in Australia when it deployed to Singapore, also took part in the fighting on Java. After a brief campaign, the majority of these personnel were taken into captivity when the Allied forces were overwhelmed around Buitenzorg in mid-March 1942, although some attempted to fight on as guerillas. Eventually these men were either killed or captured; prisoners remained in Japanese captivity until the end of the war in August 1945. During the three-and-a-half years they were held by the Japanese, members of the 2/4th were sent to prison camps around the Pacific, where they were used as slave labour and subjected to harsh conditions and extreme brutality. After the war, the surviving members of the battalion were returned to Australia but the 2/4th was not re-raised.
History edit
Formation and training edit
The 2/4th Machine Gun Battalion was one of four machine gun battalions raised as part of the all volunteer Second Australian Imperial Force (2nd AIF) for service overseas during the Second World War.[1][Note 1] Motorised infantry units, equipped with wheeled motor vehicles and tracked carriers, the machine gun battalions were formed to provide a greater level of fire support than that ordinarily available within infantry battalions.[3] Developed by the British Army, the concept had its genesis in the Australian Army during the Gallipoli Campaign in 1915, when the machine guns assigned to the infantry battalions—initially two and then four—had been grouped together and co-ordinated at brigade level, to help compensate for the lack of artillery support. On the Western Front, the concept had evolved through the establishment of machine gun companies in 1916 and finally, in 1918, to the establishment of machine gun battalions. Similar formations had also been established among the Australian Light Horse units serving in the Sinai and Palestine Campaign.[3] During the inter-war years, the machine gun battalions had been deemed unnecessary. They were not re-raised when the Army was reorganised in 1921 but in 1937, as the Australian Army looked to expand owing to fears of war in Europe, four such units were formed within the part-time Militia, by converting light horse units and motorising them. Several other Militia machine gun battalions were also raised as new units later after the Second World War began.[Note 2] These were formed by consolidating the machine gun companies assigned to a number of infantry battalions, and other light horse units were also converted into the role for use as garrison forces. Within the 2nd AIF—Australia's overseas expeditionary force—the decision was made to raise four machine gun battalions as corps troops that were usually allocated at a rate of one per division; several of the Militia units were also later designated Australian Imperial Force units, after the majority of their personnel volunteered for overseas service. This meant that they could be deployed outside of Australian territory even though they were not 2nd AIF units.[6][4][5]

In mid-1940, amid the tide of German successes in Europe, there was an influx of volunteers for the 2nd AIF. As a result, the Australian government decided to raise a third volunteer division for overseas service, named the 8th Division.[7][8] Established around three infantry brigades—the 22nd, 23rd and 27th—the division was supported by corps troops including engineers, cavalry, artillery, pioneers and a machine gun battalion for direct fire support.[8] Within this formation, the 2/4th Machine Gun Battalion came into being on 25 November 1940, when Lieutenant Colonel Michael Anketell, a First World War veteran who had commanded a Militia infantry battalion before the war, established his headquarters at Northam Camp, near Perth, Western Australia. While the rest of the 8th Division had drawn its personnel mainly from the more populous eastern states of New South Wales and Victoria, the decision was made to select personnel for the 2/4th only from those who were already enlisted and conducting training in the west. While potentially parochial, it was a primarily a pragmatic decision to reduce the time it would take to concentrate the unit and complete its training.[9][10]
Like most 2nd AIF units, the 2/4th drew its cadre staff of officers and senior non-commissioned officers (NCOs) from volunteers from local Militia units. These were augmented by partially trained Other Ranks (ORs) from the three local recruit training depots; the first batch of these, numbering 394 men, arrived at Northam on 27 November and a further 262 marched in on 4 December. As the battalion was brought up to its authorised strength of around 800 men,[11] personnel were formed into four machine gun companies, 'A' to 'D', under a headquarters company consisting of several specialist platoons—including signals and anti-aircraft platoons—and battalion headquarters.[12] There were no platoon commanders until a contingent arrived from the regional Officer Training Units. Initially training was hampered by a lack of equipment—only 12 of 48 Vickers machine guns assigned to the battalion were available—so at the start the focus was on individual rather than collective training. As more stores arrived, training accelerated with the help of experienced Militia NCOs and First World War veterans, who were brought in to share their experiences with the new troops.[13] Just before Christmas and New Year's leave, the battalion received its distinctive unit colour patch: a black and gold triangle.[14]
Early in the New Year, the establishment of the battalion's command formation was completed with the appointment of subalterns as platoon commanders, following their return from their first appointment courses. The training continuum evolved with the establishment of an NCO school and various specialist courses, including range finding and transport; a bugle and drum band was also raised.[15] In February 1941, training focused upon skill-at-arms, before undertaking a 60-mile (97 km) march from Northam to Perth, which was conducted over the course of three days and was undertaken, according to the Australian War Memorial, to test the "physical fitness and endurance of the personnel and officers" and "the efficiency of the battalion's motor transport and administration personnel".[16] Upon their return, training progressed to field firing, night manoeuvres, portage, defensive exercises and further specialised training, continuing until July, by which time the battalion was considered ready for deployment.[17] That month it received orders to move to Adelaide, South Australia.[10] Proceeding in four drafts—one each on the transports Katoomba and Duntroon and two by rail—they were established at Woodside,[18] in the Adelaide Hills, by the end of the month.[19] The battalion endured a bitter winter, conducting field exercises amidst the steep wooded slopes of the Mount Lofty Range; these became more tactically complex and physically demanding as Anketell worked the battalion up to a peak of efficiency, in preparation for deployment amidst growing tensions in the Pacific.[20]
Garrison duties in northern Australia edit

In August 1941, the 27th Brigade was sent to Malaya to reinforce the 22nd, which had been serving there in a garrison role since February, having been dispatched while the 2/4th Machine Battalion had been forming. With this, the only 2nd AIF troops remaining in Australia were those of the 23rd Brigade. As a result of concerns about Japanese intentions in the region, the decision was made to move the brigade north to bolster the defences around Darwin in the Northern Territory.[10][21] In the event of fighting in the Pacific, the government planned to split infantry battalions, to defend the island chain to Australia's north, dispatching forces to Rabaul, Ambon and Timor. The role of the corps troops from the 2/4th Pioneers and 2/4th Machine Gun Battalion remained uncertain. The 8th Division's commander, Major General Gordon Bennett, unhappy with the dispersal of his command, had been agitating for the dispatch of the machine gunners to Malaya to support his two infantry brigades, arguing that they would be valuable for beach defence. Bennett's request had been rejected initially in March, due to the limited numbers of recruits enlisting but by mid-September, elements at Army headquarters in Melbourne had also begun to advocate for it.[22] In early October, following a War Cabinet decision to split the command of the 8th Division in two, removing the elements in Australia from Bennett's command, the 2/4th Machine Gun Battalion received orders to move north to Darwin, where it was to serve in a home defence role in case of a Japanese attack.[23]
On 11 October 1941, the battalion entrained at Oakbank and began the journey north. They detrained at Alice Springs, where they camped overnight before continuing the journey by road in a 44-vehicle convoy, which took them further north to Larrimah. There they once again entrained for the final journey to Winnellie, which they reached on 19 October, after overnighting in Katherine.[24]
At Winnellie, the battalion was allocated a large defensive zone between Nightcliff, Lee Point and Shoal Bay, which included a large beach frontage, as well as extensive swamp lands and creeks further inland. Throughout November, extensive work was undertaken improving the camp and preparing this position with fortified emplacements. They also undertook various other garrison duties such as guarding ammunition dumps, and road and railway construction.[25] The battalion also detached a company to Adelaide River for a period to complete construction tasks during this time.[18] Heavy summer rains flooded the camp and surrounding area and as well as hampering construction, brought a wave of dengue fever among the battalion and the threat of crocodile attacks as the creeks within the battalion position swelled;[26] the battalion's mascot, a dog named "Gunner", fell victim.[27] News of the Japanese attack on Pearl Harbor and invasion of Malaya came in early December and with it a need to bolster Australian forces in the Pacific. As Bennett pressed harder for reinforcements, on 23 December the 2/4th Machine Gun Battalion received orders to embark for Malaya.[28][29]
Embarkation edit
On 30 December 1941, after transferring responsibility for their defensive area to a Militia Light Horse machine gun regiment from South Australia, the battalion embarked upon two troopships, Westralia and Marella, bound for Malaya via Port Moresby, Sydney and then Fremantle.[30][18] Arriving on 4 January 1942, they were transferred to the transport Aquitania, which was to take them the rest of the way. Before they had completed transferring the battalion's equipment, news was received that Rabaul, about 500 miles (800 km) north-east, had been bombed by carrier-based aircraft. Due to concerns that the aircraft may have been looking for the convoy, or US warships fleeing the Philippines, and that Port Moresby might be bombed next, the convoy's departure was advanced and so they sailed immediately. Instead of proceeding to Malaya, though, they were taken to Sydney, as it was decided that it would be safer to proceed via the southern route.[31]
After a brief stay in Sydney where the battalion's equipment deficiencies were made good and some reinforcements were received from local recruit training depots, they embarked again on 10 January in company with HMAS Canberra, and proceeded through the Bass Strait. As they were under way, the troops were kept occupied with training on the Bren light machine gun and the Thompson sub-machine gun, quantities of which were hastily added to the battalion's equipment scale.[32] They reached Fremantle, on 15 January and overnight, a large number of 2/4th men defied orders to stay aboard ship and went ashore to spend time with their families; when the Aquitania sailed the next day, 94 men were left behind.[33] The situation in Malaya was grave as the Japanese were steadily pushing the British and Commonwealth defenders south down the peninsula and as the gravity of the situation dawned upon the Australian government, a knee-jerk reaction saw the dispatch of 150 partially trained reinforcements from Northam. They arrived just as the Aquitania departed, being ferried out to Rottnest Island where they joined the ship's company late in the afternoon of 16 January. Although the reinforcements made good the men that had been left behind, they were only partially trained and ill-prepared for the fighting that would follow.[34]

After departing Fremantle, the convoy steamed towards Java and reached Ratai Bay early on 20 January. Proceeding on to the Sunda Strait, which was reached mid-morning on 21 January and the men were then transferred to a number of smaller, faster Dutch ships to run the gauntlet of Japanese bombers that were attacking Allied shipping in the area. In concert with several Australian, British and Indian escorts and two Dutch Catalina flying boats, the convoy entered Keppel Harbour on 25 January 1942.[35] Upon arrival in Singapore, consisting of 942 personnel of all ranks,[36] the battalion was allocated to the task of preparing machine gun positions on Singapore's north coast and around the naval base. They stepped into a maelstrom, the Japanese were bombing the naval base—where the 2/4th were accommodated—every day and the fighting on the Malay Peninsula was all but over.[10] Having been pushed back down the peninsula over the course of seven weeks, in the final week of January, the Allies withdrew from Johore, on the mainland, to Singapore, where they would make a final stand. Covering the withdrawal, the 22nd Brigade was the last Australian unit to cross the 70-foot (21 m) wide Causeway before it was blown up, early on the morning of 31 January, to prevent the Japanese from capturing it and to slow their advance.[37][38]
One of only two machine gun battalions available for the defending British and Commonwealth forces, as preparations were made to repulse the expected Japanese assault across the Johore Strait, the battalion was split up to provide support to troops from the 22nd and 27th Australian Infantry Brigades and the 44th Indian Infantry Brigade around the western part of the island, where the Japanese assault was expected.[39] 'B' Company was allocated to support the 27th, while 'C' Company was sent to the 44th and 'D' Company went to the 22nd. 'A' Company was initially held in reserve.[18] On 7 February, due to concerns about the lack of defending infantry, about 90 machine gun reinforcements, who had been hastily formed into a sixth company—'E'—were detached at this time to form part of a 400-strong Special Reserve Battalion, initially under the command of an officer from the 2/19th Infantry Battalion and later taken over by Major Albert Saggers, formerly of the 2/4th Machine Gun Battalion.[40][41]
Fall of Singapore edit
The Japanese attack came in the night of 8/9 February, after a heavy artillery and aerial bombardment that had lasted throughout the day. 'D' Company, positioned in various locations in support of the Australian 22nd Brigade in the north-western area, found themselves in the thick of the fighting as the Japanese concentrated their landing on the Australian 8th Division front.[42] Understrength and stretched out across a large frontage over ground that was unsuited to defence, the Australians were almost immediately under pressure. Shortly after 8:00 pm, 13 Platoon, supporting the 2/20th Infantry Battalion around the head of the Lim Chu Kang Road, was confronted by a large number of landing barges filled with Japanese assault troops.[43] For almost six hours, the platoon, under Lieutenant Eric Wankey, fought a desperate action to repel the invaders. With four machine guns, as well as personal small arms and grenades, the platoon inflicted heavy casualties on the Japanese and sank several barges. Despite heavy casualties from Japanese mortar and machine gun fire, they kept fighting until early in the morning on 9 February when, threatened with being outflanked and low on ammunition—each gun had fired over 10,000 rounds—and having had one gun knocked out, the platoon was forced to withdraw. Destroying their equipment as they went to prevent it from being captured, the platoon was forced to withdraw in contact, taking their wounded with them; the action was later rewarded with a Military Cross for the platoon commander, who was badly wounded after taking over one of the machine guns after its crew had been wounded.[44][45]
Near the Sungei Murai (Murai River), 15 Platoon—under Lieutenant John Meiklejohn—had been stationed in support of a company from the 2/18th Infantry Battalion, in a thickly wooded area with low hills and many inlets. 15 Platoon established an enfilade formation near the shore, with its machine guns distributed in two sections on a north–south axis, facing a narrow peninsula, between the mouth of the Murai and a small inlet.[46] According to the official history by Lionel Wigmore, after a Japanese landing party approached, the southern section under Meiklejohn "opened fire against six approaching barges, and kept on firing for two hours, despite retaliation by hand grenades, as the Japanese landed and crossed the neck of the peninsula".[47] As was the case elsewhere in the extremely wide sector assigned to the 22nd Brigade, many Japanese landing parties were able to outflank the thinly-spread Australian positions. At risk of being cut off and with ammunition running low, Meiklejohn ordered the southern section to retreat. According to Wigmore: "Meiklejohn led his section along a jungle path where they came upon a party of Japanese resting. He shot some with his revolver, and another was knocked out with a swing from a [machine gun] tripod, but Meiklejohn lost his life in attempting to cover his section's withdrawal."[47] The northern section of 15 Platoon held its ground "until it was informed that a near-by infantry platoon was almost surrounded, and about to withdraw".[47] Forced to retreat without its machine guns, the northern section also found Japanese troops blocking its path.[47][48] When Private Cliff Spackman was attacked by a Japanese officer wielding a sword, Spackman "bayoneted him", took the sword and used it against another Japanese soldier.[47]

As the situation worsened, early on 9 February 'A' Company, which had been in reserve, and HQ Company were sent forward to provide further assistance to the 22nd Infantry Brigade, which was slowly being pushed back towards the tactically important Tengah airfield, via the village of Ama Keng.[49] They took up positions at Bulim, east of the airfield; shortly afterwards they were joined by 7 Platoon, from 'B' Company, which had been detached from the Causeway sector.[50] The remnants of the 22nd, numbering around only 500 men from its original 2,500,[51] with a further 500 or so isolated and attempting to fight their way through, was pushed further back throughout the day. Orders were passed for a counter-attack around the airfield but as the size of Japanese forces in the area grew to around 20,000 men,[52] they were later cancelled in favour of establishing a line between Bulim and Jurong, to the east of the airfield.[53] Established in the early afternoon, within this line, the 2/4th's 'A' Company was positioned east of Bulim with 7 Platoon, 'B' Company, while the remnants of 'D' Company, amounting to only 47 men, were moved south, where they joined with 'C' Company, which was supporting the Indian 44th Brigade, which although it had not yet been engaged, had fallen back from the south-west coast to avoid being cut off and had established itself west of Ulu Pandan, behind the Sungei Jurong.[54]
Late on 9 February, the Japanese made more landings, in the Causeway sector, held by the 27th Infantry Brigade.[55] Despite having been reduced to just two infantry battalions due to the transfer of the 2/29th to the hard-pressed 22nd Infantry Brigade, they were able to mount a stiff defence, supported by the machine guns of 'B' Company. 8 Platoon inflicted many casualties in the Japanese landing craft coming ashore at the mouth of the Sungei Mandi.[56] With casualties mounting and pressure being placed on the brigade's rear due to a large gap that had developed around Kranji, by the Japanese advances in the 22nd Infantry Brigade's area, the decision was made to withdraw from the beach and realign north–south along the Woodlands Road.[57][58] Further south, the Australian 22nd and Indian 44th, 6th/15th and 12th Infantry Brigades also established themselves along this axis between Bukit Panjang and Pasir Panjang on the south coast and by early evening on 10 February the Japanese had secured the entire west coast of the island.[10]
For the next four days, the Allied troops were pushed south-east towards the city of Singapore. Throughout this time, the battalion's companies were in almost constant action, either—in the case of 'B', 'C', 'D' and 'E' Companies—under separate command, or 'A' and 'HQ' Companies with battalion headquarters.[59] The reinforcements of 'E' Company, detached to the Special Reserve Battalion, suffered heavily. In three days, they lost 43 men killed or missing, before the ad hoc formation was disbanded and the men returned to the 2/4th.[60] 7 Platoon, 'B' Company, took on a mounted role, procuring four Bren carriers, with which they began patrolling in support. On 12 February they were engaged along the Buona Vista Road, while supporting the Malayan Regiment. The following day, they were attacked by a Japanese light tank, which knocked out one of the carriers before the platoon extricated themselves.[61]
By 14 February, the Allied troops had withdrawn into a small perimeter around the city. The 8th Division were holding a position 2 miles (3.2 km) east of the city, centred upon the axis of the Holland Road, with its headquarters at Tanglin Barracks. With the Japanese gaining ground to their north and south through the porous lines of the Indian 44th and British 54th Brigades, the situation became critical.[62] Threatened with being cut off, Anketell began to plan a last stand; moving forward to survey the situation he was badly wounded by mortar and small arms fire and after being evacuated to Alexandra Hospital, died of his wounds late in the evening of 14 February.[63] Despite his loss, the battalion kept on fighting to the very end, sending out patrols throughout the following day and severely mauling a Japanese vehicle convoy that came too close to their position.[64] Late on 15 February, the British commander, Lieutenant General Arthur Percival gave the order to surrender. The physical process of the surrender was slow, and despite orders to surrender weapons and ammunition, the men proceeded to destroy the majority of their equipment the following morning, before the Japanese arrived. Later, they were marched to Changi prison, during which several men from the battalion attempted to escape after the Japanese began executing several prisoners; one, the regimental sergeant major, Fred Airey, successfully made it to Sumatra but was later recaptured there, while another, Private Les McCann, remained on the run for eight days before being recaptured after collapsing from bullet wounds he had received during the attempt.[65]
Java detachment edit
While the majority of the battalion was fighting on Singapore, a small detachment of 106 men were sent to Java.[66] The majority of these were the 94 men that had failed to return in time from their unofficial leave in Fremantle. After missing their ship, they had been arrested by the military police and were confined to quarters in Karrakatta Camp for two weeks. On 30 January they were released and under the command of two officers and a small group of NCOs, they embarked upon Marella, which set out for Singapore via Palembang in Batavia, escorted by Canberra.[67]
After reaching Tanjung Priok on 10 February, the detachment found itself placed under Dutch command and formed into a composite infantry company, within the reserve battalion of the ad hoc formation known as "Blackforce", which had been formed under Brigadier Arthur Blackburn.[68][69] At the end of the month, having taken Sumatra, the Japanese invaded Java with three divisions and a strong naval task force. Fierce fighting at sea ensued, during which 14 out of a force of 18 Allied ships were sunk. Several Japanese transports were also sunk but the majority of Japanese troops were landed. The detachment from the 2/4th found itself around Buitenzorg, where the majority of the 2/4th personnel formed part of an ad hoc infantry force, known as the Reserve Group, or 3rd Battalion, consisting of eight platoons, under Major John Champion de Crespigny.[69] They fought several defensive actions before being overwhelmed and taken into captivity on 12 March 1942. A small number continued to fight as guerrillas but were eventually all captured. Some of the men were held in camps in Java and Sumatra, although the majority were later sent to Singapore before being transported to camps elsewhere in south-east Asia.[68]
Internment and disbandment edit

During the fighting, out of a total of 976 men deployed, the battalion lost 137 men killed in action and 106 wounded, while a further 24 suffered from shell shock.[70] A total of 808 men were taken into captivity,[10] including most of the wounded. Four men managed to escape to Australia but of the remaining men, 263 died while prisoners of war.[71] Following their capture, the men from the 2/4th in Singapore were concentrated in Changi prison, before being split up and sent to various prison camps around the Pacific, including Borneo, Burma, Thailand, Java, Sumatra, Japan and Formosa.[72][18] There they were used as slave labour on the Burma–Thai Railway, in coal mines and on wharves, during which they were subjected to harsh treatment, starvation, disease and extreme brutality, which took a heavy toll.[73] Many soldiers from the 2/4th were also killed while being taken to Japan, when the ships were sunk by Allied submarines.[74]
Throughout their captivity, some soldiers continued to contribute to the Allied war effort, building a series of home-made radios with which they transmitted Japanese shipping movements to British forces in India and through which they were able to gain news from home.[75] They were liberated in August 1945 and after the war, the surviving members of the battalion were returned to Australia but the 2/4th was not re-raised.[10][76] Members of the battalion received the following decorations: one Military Cross, one Distinguished Conduct Medal, two British Empire Medals and nine Mentions in Despatches; in addition one member of the battalion was appointed as a Member of the Order of the British Empire.[70]
After the war, the Australian Army moved away from the machine gun battalion concept and no similar units were raised. The machine gun role was subsumed into the support companies of individual infantry battalions.[1] The idea was arguably misunderstood by Australian commanders throughout the war and this may have influenced the decision to move away from the concept. When the units had been established, the intent had been for machine gun battalions to provide highly mobile fire support[77] but this only worked where the principles of open warfare worked.[78] Once the focus of Australian Army combat operations shifted to the Pacific, the machine gun battalions were largely misused, being employed in a static defensive capacity against short and medium range targets or for menial tasks, rather than as offensive weapons for long range fire support. The medium machine guns were also largely used in the same manner as light machine guns, such as the Bren. Other reasons identified for the concept's limited use include distrust of overhead fire by some commanders, a preference for organic fire support over attached sub-units, over-estimating the difficulty of transporting Vickers guns in the jungle and a tendency to ignore targets that could not be seen.[77] The difficulties of target acquisition in dense jungle also contributed.[79]
Commanding officers edit
- Lieutenant Colonel Michael Anketell.[10]
Battle honours edit
The 2/4th Machine Gun Battalion received the following battle honours for its service during the Second World War:
- Malaya 1942, and Singapore.[10]
Notes edit
Footnotes
- ^ The numerical designation of 2nd AIF units was prefixed by "2/", which was used to set them apart from Militia units or units of the First Australian Imperial Force, which did not use a prefix.[2]
- ^ For example, the 6th and 7th Machine Gun Battalions.[4][5]
Citations
- ^ a b Dennis et al. 1995, p. 372.
- ^ Long 1952, p. 51.
- ^ a b Dennis et al. 1995, pp. 371–372.
- ^ a b Campbell 2007.
- ^ a b Campbell 2013.
- ^ Dennis et al. 1995, p. 371.
- ^ Grey 2008, p. 152.
- ^ a b Cody 1997, p. 3.
- ^ Cody 1997, p. 8.
- ^ a b c d e f g h i Australian War Memorial.
- ^ Cody 1997, p. 36.
- ^ Cody 1997, pp. 353–366.
- ^ Cody 1997, pp. 9–11.
- ^ Cody 1997, p. 12.
- ^ Cody 1997, p. 14.
- ^ 2nd AIF in Perth March.
- ^ Cody 1997, pp. 16–23.
- ^ a b c d e McKenzie-Smith 2018, p. 2354.
- ^ Cody 1997, pp. 36–37.
- ^ Cody 1997, pp. 38–45.
- ^ Wigmore 1957, p. 83.
- ^ Wigmore 1957, p. 101.
- ^ Cody 1997, p. 56.
- ^ Cody 1997, pp. 50–55.
- ^ Cody 1997, pp. 56–57.
- ^ Cody 1997, pp. 57–58.
- ^ Cody 1997, p. 61.
- ^ Cody 1997, pp. 59–60.
- ^ Wigmore 1957, p. 184.
- ^ Cody 1997, pp. 61–62.
- ^ Cody 1997, pp. 63–64.
- ^ Cody 1997, pp. 65–66.
- ^ Cody 1997, pp. 66–67.
- ^ Cody 1997, pp. 69–70.
- ^ Cody 1997, pp. 70–72.
- ^ Wigmore 1957, p. 258.
- ^ Wigmore 1957, p. 283.
- ^ Hall 1983, p. 103.
- ^ Wigmore 1957, p. 297.
- ^ Wigmore 1957, p. 304.
- ^ Cody 1997, p. 129.
- ^ Wigmore 1957, p. 310.
- ^ Cody 1997, p. 113.
- ^ Wigmore 1957, p. 311.
- ^ Cody 1997, pp. 113–116.
- ^ Wigmore 1957, pp. 313–314.
- ^ a b c d e Wigmore 1957, pp. 314.
- ^ Cody 1997, pp. 118–120.
- ^ Wigmore 1957, pp. 317–319.
- ^ Cody 1997, pp. 128–129.
- ^ Wigmore 1957, p. 323.
- ^ Cody 1997, p. 132.
- ^ Wigmore 1957, pp. 323–324.
- ^ Cody 1997, pp. 130–132.
- ^ Wigmore 1957, p. 331.
- ^ Cody 1997, p. 135.
- ^ Wigmore 1957, p. 344.
- ^ Cody 1997, p. 134–136.
- ^ Cody 1997, p. 155.
- ^ Cody 1997, p. 150.
- ^ Cody 1997, p. 157.
- ^ Wigmore 1957, p. 374.
- ^ Cody 1997, p. 171.
- ^ Cody 1997, p. 177.
- ^ Cody 1997, pp. 188–191.
- ^ Cody 1997, pp. 186, 350.
- ^ Cody 1997, pp. 73–74.
- ^ a b Cody 1997, p. 186.
- ^ a b Wigmore 1957, p. 496.
- ^ a b Cody 1997, p. 350.
- ^ Cody 1997, pp. 328–350.
- ^ Cody 1997, p. 286.
- ^ Cody 1997, pp. 203–306.
- ^ Cody 1997, pp. 306, 313, 318.
- ^ Cody 1997, p. 323.
- ^ Rodger 2003, p. 483.
- ^ a b Hocking 1997, pp. 309–313.
- ^ Fraser 2013, p. 60.
- ^ Fraser 2013, pp. 61, 74.
References edit
- "2/4th Machine Gun Battalion". Second World War, 1939–1945 units. Australian War Memorial. Retrieved 23 November 2012.
- "2nd AIF in Perth March". Film. Australian War Memorial. Retrieved 27 February 2016.
- Campbell, John (2007). Machine-Gunners: A History of 6 Australian Machine-Gun Battalion, AIF 1942–1944. Loftus, New South Wales: Australian Military History Publications. ISBN 978-1-876439-83-5.
- Campbell, John (2013). New Guinea Machine Gunners: A History of 7th Machine Gun Battalion AIF 1942–1944. Jannali, New South Wales. ISBN 978-0-9872387-2-6.
{{cite book}}: CS1 maint: location missing publisher (link) - Cody, Les (1997). Ghosts in Khaki: The History of the 2/4th Machine Gun Battalion, 8th Division AIF. Carlisle, Western Australia: Hesperian Press. ISBN 0-85905-235-4.
- Dennis, Peter; Grey, Jeffrey; Morris, Ewan; Prior, Robin (1995). The Oxford Companion to Australian Military History (1st ed.). Melbourne, Victoria: Oxford University Press. ISBN 0-19-553227-9.
- Fraser, Bryce (2013). The Combat Effectiveness of Australian and American Infantry Battalions in Papua in 1942–1943 (PhD thesis). Wollongong, New South Wales: University of Wollongong.
- Grey, Jeffrey (2008). A Military History of Australia (3rd ed.). Port Melbourne, Victoria: Cambridge University Press. ISBN 978-0-521-69791-0.
- Hall, Timothy (1983). The Fall of Singapore 1942. North Ryde, New South Wales: Methuen Australia. ISBN 0-454-00433-8.
- Hocking, Philip (1997). The Long Carry: A History of the 2/1st Australian Machine Gun Battalion, 1939–1946. Melbourne, Victoria: 2/1 Machine Gun Battalion Association. ISBN 0-646-30817-3.
- Long, Gavin (1952). To Benghazi. Australia in the War of 1939–1945. Series 1 – Army. Vol. I (1st ed.). Canberra, Australian Capital Territory: Australian War Memorial. OCLC 18400892.
- McKenzie-Smith, Graham (2018). The Unit Guide: The Australian Army 1939–1945, Volume 2. Warriewood, New South Wales: Big Sky Publishing. ISBN 978-1-925675-146.
- Rodger, Alexander (2003). Battle Honours of the British Empire and Commonwealth Land Forces 1662–1991. Marlborough, Wiltshire: The Crowood Press. ISBN 1-86126-637-5.
- Wigmore, Lionel (1957). The Japanese Thrust. Australia in the War of 1939–1945, Series 1 – Army. Vol. IV (1st ed.). Canberra, Australian Capital Territory: Australian War Memorial. OCLC 3134219.
Further reading edit
- Anonymous (1961). 2/4th Machine Gun Battalion, AIF, on Active Service 1941–1945. Perth, Western Australia: 2/4th Machine Gun Battalion Association. OCLC 758343423.
- Ewen, Murray (2003). Colour Patch: The Men of the 2/4th Australian Machine Gun Battalion, 1940–1945. Victoria Park, Western Australia: Hesperian Press. ISBN 0-85905-312-1.