


Summary
The 3rd West Lancashire Artillery (3rd West Lancs Artillery) was a volunteer unit of Britain's Territorial Force recruited from Liverpool that saw action during the First World War, distinguishing itself at the Battle of the Avre. During the Second World War, it served in the air defence and medium artillery roles at home and in the Far East. Its successor unit continues to serve as a battery in the modern Army Reserve.
| 3rd West Lancashire Brigade, RFA 70th (3rd West Lancashire) HAA Regiment 208 (3rd West Lancashire) Battery | |
|---|---|
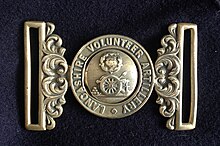 Waistbelt of the Lancashire Volunteer Artillery, post-1891 | |
| Active | 2 April 1860–present |
| Country | |
| Branch | |
| Role | Garrison artillery Position artillery Field artillery Anti-aircraft artillery Medium artillery |
| Garrison/HQ | Liverpool |
| Engagements | |
| Commanders | |
| Notable commanders | Lt-Col Robert Trimble |
Volunteer Force edit
The enthusiasm for the Volunteer movement following an invasion scare in 1859 saw the creation of many Volunteer Corps composed of part-time soldiers eager to supplement the Regular British Army in time of need.[1][2] One such unit was the 15th Lancashire Artillery Volunteer Corps (AVC) of two batteries, which was formed at Garston, Liverpool, on 2 April 1860, with additional batteries raised on 2 July 1863 and 16 November 1865.[3][4][5][6][7] The first officers commissioned into the unit included two Captains (one for each battery), with the senior, Philip Tinne, as Captain-Commandant.[8] One of the First Lieutenants, John Mewburn, was formerly of the Queen's Own Canadian Militia. He was promoted to captain on 20 November 1860,[9] and became captain-commandant in April 1862.[10] By 1865 he was a Major.[11]
Although the smaller Lancashire AVCs were grouped together into administrative battalions, the 15th remained independent, although between 1863 and 1867 it was attached to the Manchester-based 19th Lancashire AVC for administrative purposes.[3][4][5] As the unit expanded, Mewburn was superseded in command by the local linen merchant Robert Trimble, who joined from the Liverpool Irish and had financed the raising of the third battery.[12] Trimble was commissioned lieutenant in the 15th Lancashire AVC on 13 December 1862,[13] promoted to captain on 2 July 1863,[14] and became Lieutenant-Colonel in command.[11] Mewburn returned to the command with the rank of Lt-Col on 23 February 1875 after Trimble resigned to emigrate to New Zealand,[15] whereupon Trimble became the first Honorary Colonel of the unit.[16] Mewburn retired on 19 April 1890.[17] and H.J. Robinson, VD, later succeeded as Lt-Col in command (11 May 1892).[11] The unit established its headquarters (HQ) at Lark Lane, Liverpool, in 1877, and moved to 65 Admiral Street by 1880.[7][11]
When the Volunteers were consolidated in 1880, the unit was redesignated the 6th Lancashire AVC (the original 6th had been disbanded in 1863), with the following organisation:[3][4][5][7][11]
- No 1 Battery at Liverpool
- No 2 Battery at Liverpool
- No 3 Battery at Liverpool
- No 4 Battery at Garston
- Half Battery at Hale
- No 5 Battery
By the end of 1880 the unit had reached a strength of nine batteries. In 1882 it was assigned to the Lancashire Division of the Royal Artillery, but when the divisional structure was reduced in 1889 it joined the Southern Division.[3][4][11][18]
The AVCs were intended to serve as garrison artillery manning fixed defences, but a number of the early units manned semi-mobile 'position batteries' of smooth-bore field guns pulled by agricultural horses. However, the War Office (WO) refused to pay for the upkeep of field guns and the concept died out in the 1870s. It was revived in 1888 when some Volunteer batteries were reorganised as 'position artillery' to work alongside the Volunteer infantry brigades. From 14 July 1892 the 6th Lancashire Volunteer Artillery had an establishment of one position bty and seven garrison companies, but by 1893 consisted entirely of position batteries, referred to as 'heavy batteries' from 1902.[3][5][11][19]
On 1 June 1899 all the Volunteer artillery units became part of the Royal Garrison Artillery (RGA) and from 1 January 1902 when the RA's divisional structure was abolished, the unit became the 6th Lancashire Royal Garrison Artillery (Volunteers).[3][4][19] Lieutenant-Colonel W.W. Gossage, VD, took over the command in 1904.[11]
Territorial Force edit
When the Volunteers were subsumed into the new Territorial Force (TF) under the Haldane Reforms of 1908,[20][21] the 6th Lancashire transferred to the Royal Field Artillery (RFA) as the 3rd West Lancashire Brigade, with the following organisation:[4][5][11][22][23][24]
- HQ at 65 Admiral Street, Liverpool
- 12th Lancashire Battery at Admiral Street
- 13th Lancashire Battery at 1 Earp Street, Garston
- 14th Lancashire Battery at Widnes
- 3rd Lancashire Ammunition Column at Admiral Street
It formed part of the TF's West Lancashire Division, and each battery was equipped with four BLC 15-pounder guns.[25][26][27]
First World War edit
Mobilisation edit

Annual training had just begun when war was declared on 4 August 1914, and the units returned to their peace stations to mobilise. 3rd West Lancashire Brigade mobilised at Admiral Street under the command of Lt-Col J.P. Reynolds, CO since 1909.[11][25][26][28][29] Immediately after the outbreak of war, TF units were invited to volunteer for Overseas Service, and on 15 August the War Office issued instructions to separate those men who had signed up for Home Service only, and form them into reserve units. On 31 August, the formation of a reserve or 2nd Line unit was authorised for each 1st Line unit where 60 per cent or more of the men had volunteered for Overseas Service. The titles of these 2nd Line units would be the same as the original, but distinguished by a '2/' prefix. In this way duplicate brigades, batteries and divisions were created, mirroring those TF formations being sent overseas.[28][30]
1/3rd West Lancashire Brigade, RFA edit
During the winter of 1914–15 the infantry of the West Lancashire Division were sent to reinforce the British Expeditionary Force (BEF) fighting on the Western Front. In April 1915 the artillery and other divisional units remaining at home were attached to the 2nd West Lancashire Division, which was training round Canterbury and whose own artillery did not join until September.[25][26][30][31]
In September 1915 the brigade was re-equipped with modern 18-pounder guns, handing its old guns over to the 2nd Line, and it sailed for the Western Front with 2nd Canadian Division. It completed disembarkation at Le Havre on 1 October and moved up to Locre and Berthen. The Lancashire RFA brigades were only with the Canadians for a short time, because in November the War Office decided to re-form the 1st West Lancashire Division (as the 55th (West Lancashire) Division). The 3rd West Lancashire Bde joined the reformed division at Hallencourt on 4 January 1916.[25][26][27][30][32]

In May 1916 the BEF's field artillery underwent reorganisation. First, on 5 May, the 3rd West Lancashire formed a fourth 4-gun battery, designated D. Then on 15 May the other three batteries were redesignated A, B and C, and the brigade became CCLXXVII (or 277) Brigade, RFA. The brigade ammunition columns were absorbed into the divisional ammunition column on 18 May. Finally, on 23 May, D Bty was swapped with C (H) Bty of CCLXXVIII (H) Brigade (the former 4th West Lancashire (Howitzer) Brigade, though C/CCLXXVIII Bty was originally a Kitchener's Army battery from 18th (Eastern) Division[33][34]). This battery became D (H), armed with 4.5-inch howitzers.[23][25][27][28][35][36]
Somme edit
Once assembled, 55th (West Lancashire) Division went into the line in the Wailly–Bretancourt area. When the Battle of the Somme opened further south on 1 July, the divisional artillery fired an intense bombardment along its whole divisional front as a diversion. The division was then relieved on 25 July, when it moved south into the line opposite Guillemont in the Somme sector.[25][26][37] On 8 August, two infantry brigades of the division carried out an attack on Guillemont. For the whole of the previous day and up to Zero hour (04.20) on 8 August, the divisional artillery and heavy guns kept up a continuous bombardment (described as 'awe-inspiring') of the enemy positions, particularly Guillemont village, which was known to be strongly fortified. When the infantry advanced they were preceded by a creeping barrage (a new technique at the time) fired by the divisional artillery supported by other batteries. The attack on the right was successful, and at 05.20 the infantry on the left were reported to be in Guillemont Station, but the centre was held up by a belt of barbed wire and the barrage had to be brought back to support them. Meanwhile, the Liverpool Irish held on the village until most were killed or captured. The attack was renewed the following day with another barrage commencing at 04.20 and making its first 'lift' forward at 04.23. However, the leading battalion was unable to get into position until 05.00, and then made a gallant attack without the benefit of the barrage, suffering heavy casualties.[38][39]
The division was relieved on the night of 14/15 August, but the divisional artillery remained in the line supporting other formations. 55th (West Lancashire) Division came back into the line on 4/5 September, facing Ginchy and Delville Wood, where it launched an attack on 9 September (in the Battle of Ginchy). The divisional and heavy artillery began a deliberate bombardment at 07.00 and continued to Zero hour (16.45), when the field artillery fired a creeping barrage behind which the infantry advanced. The German artillery replied to the bombardment by shelling the support trenches and firing gas shells into the battery positions. The leading infantry companies followed the barrage closely and attacked 'Hop Alley', 'Ale Alley' and 'Pint Trench', but Hop Alley proved stronger than expected and there was an additional hidden trench that had not been discovered or bombarded. The rest of the divisional attack was successful, and another attempt on the Hop Alley–Ale Alley complex was made two days later by a surprise attack without artillery preparation, which was also unsuccessful.[40]
After a short rest the 55th (West Lancashire) Lancashire Division was thrown in again at the Battle of Morval on 25 September. The infantry attacked at 12.35, keeping closer to the creeping barrage than ever before, and the first phase of the attack was successful. The captured position was consolidated behind a standing barrage, and then the barrage moved on and the infantry captured the second objective. Next day the success was exploited towards 'Gird Trench' and 'Gird Support' after a seven-hour bombardment. The Liverpool Irish took the objectives by 15.15 and the retreating Germans were caught by the barrage and suffered heavily. A counter-attack attempt at 15.50 was also caught in the open by the artillery and the German infantry fled from the guns. The division was relieved on 28 September and left the Somme front.[25][26][41][42]
Army Field Brigade edit
In October there was another reorganisation of the field artillery to bring the 18-pounder batteries up to a strength of six guns each. On 4 October, A Bty was split up between B and C, and on 7 October it was replaced by B/CCLXXVIII Bty.[36][25][27]
On 18 January 1917 the brigade left 55th Division and became an Army Field Brigade (AFA).[25][26][27][43][44] The recently joined A Bty left again and was replaced by A/CLXXIX Bty (from 179th (Deptford) Brigade, RFA, of 39th (Deptford) Divisional Artillery). D (H) Bty was brought up to 6-gun strength by Right Section from D (H)/CLXXIX.[25][27] 39th Division was a 'Pals' formation whose artillery had been recruited by the mayor and Corporation of Deptford from Deptford and Lee Green in East London.[45][46]
- A Bty (6 x 18-pounders) – originally A/CLXXIX from Lee Green
- B Bty (6 x 18-pounders) – originally 13th Lancashire Bty + half 12th Lancashire Bty
- C Bty (6 x 18-pounders) – originally 14th Lancashire Bty + half 12th Lancashire Bty
- D (H) Bty (6 x 4.5-inch howitzers) – originally 266 (H) Bty from Eastern England + R Section of D (H)/CLXXIX from Deptford
Ypres edit
At first the brigade was attached to VIII Corps supporting 55th and 39th Divisions. Then on 28 May it moved to X Corps for the Battle of Messines (7 June) when it fired in support of 41st Division. The field artillery were allocated 1000 rounds per gun for 18-pounders and 750 rounds for 4.5-inch howitzers, together with large amounts of gas and smoke shells. The guns and all this ammunition were assembled in secrecy, the AFAs moving into the area a battery at a time over a long period, though some were subjected to German counter-battery (CB) fire. The battle is remembered for the explosion of massive mines, but after that it was fundamentally an artillery battle, with two-thirds of the 18-pounders firing a creeping barrage ahead of the attacking infantry, the remainder and the 4.5s firing standing barrages 700 yards (640 m) beyond that. These barrages were practised on 3 and 5 June. At Zero on 7 June, after the mines had been fired, the infantry advanced behind their barrage with little opposition. Local counter-attacks were destroyed by the creeping and standing barrages. Later in the day the field batteries began to move forward across the shattered No man's land to bring the further objectives into range.[43][47]

CCLCCVII AFA left X Corps on 8 July and moved to II Corps supporting 8th Division to prepare for the Third Ypres Offensive. Once again there was a massive concentration of guns and ammunition: for this assault there was one 18-pounder for every 15 yards (14 m) of the attacking front. On II Corps' front the guns were hidden close-packed behind woods between Zillebeke and Verbrandemolen. The artillery duel went on for several weeks before the attack, with British batteries taking heavy casualties from German CB fire and gas shelling. The offensive opened on 31 July with the Battle of Pilckem Ridge, the infantry advancing behind the biggest barrage programme yet devised. Despite setbacks – II Corps suffering the worst hold-up in front of Westhoek on the Gheluveldt Plateau and losing the barrage – a general advance of 3,000 yards (2,700 m) was achieved, but by evening rain was falling heavily and it proved almost impossible to move the guns and ammunition up through the mud. Gun detachments became exhausted and the bombardment for the next phase attack had to be postponed.[43][48][49][50][51]
The brigade came under the orders of 25th Division for the Capture of Westhoek on 10 August and then of 18th (Eastern) Division for the Battle of Langemarck on 16–18 August. The time for preparation had been too short and the artillery plan for Langemarcke was not a success.[43][52][53][54][55][56]
After a spell back under 8th Division, the brigade was withdrawn for rest on 25 August. It moved to IX Corps on 9 September, supporting 19th (Western) Division in the more successful series of set-piece battles at the Menin Road Ridge (20–25 September), Polygon Wood (26 September–3 October), and Broodseinde (4 October), followed by the failures at Poelcappelle (9 October) and the First Battle of Passchendaele (12 October). The earlier battles were marked by effective artillery support, but later the strain of bringing guns and ammunition up through the mud, casualties suffered, and the unstable gun platforms leading to inaccuracy, led to this support falling away as the campaign developed. At First Passchendale the 18th Division advanced scarcely 100 yards (91 m).[43][57][58][59][60][61]
Cambrai edit
After Passchendaele, CCLXXVII Bde was withdrawn to rest for the remainder of the month, then spent the first half of November in a quiet sector with 46th (North Midland) Division in I Corps before moving to support 12th (Eastern) Division in III Corps for the Battle of Cambrai. As with Messines, the first phase of this battle was an artillery victory thanks to massive and well-planned preparation and tactics, though in this case the element of surprise was provided by the first mass use of tanks and the guns were silent until Zero hour on 20 November. Behind its tanks and barrage (one third smoke shell, one third Shrapnel shell, and one-third high explosive (HE)), 12th Division took its objectives of Bonavis Rdge, Gonnelieu Ridge and Lateau Wood. The barrage was fired according to plan, with two successive lifts (rather than creeping) to Lateau Trench, then falling behind Bonavis Farm (leaving the buildings for the heavy guns) and finally providing a protective barrage beyond the Brown Line (the second objective). The guns were then moved forwards.[43][62][63][64]
After its initial success, the battle bogged down into bitter fighting round Bourlon Wood, during which 12th Division was largely inactive. The Germans were preparing a major counter-offensive, and on 29 November III Corps assigned HQ, A and D (H) Btys of CCLXXVII Bde to support 6th Division. Both divisions were caught up in the counter-attack that came on 30 November, when the Germans penetrated behind 12th Division to Gonnelieu and III Corps lost 12 18-pounders and other guns. Desperate defence continued for several days, with the British withdrawing to a stronger line on 5 December.[43][65][66]
Spring Offensive edit
On 8 December the brigade was reunited and transferred to 16th (Irish) Division in VII Corps, with which it stayed during the winter, apart from a period of rest for most of January 1918.[43] When the German spring offensive opened on 21 March 1918, the salient held by 16th Division was quickly overrun and the survivors tried to make a stand round Ronssoy. The field guns were in gun pits and could neither be swung to meet close threats, nor easily withdrawn, although some were removed at the trot by their horse teams. Although their observation posts (OPs) were virtually blinded by the mist and their communication links cut by shellfire, many batteries continued firing until overrun. Of the division's own two field brigades, and the two AFAs attached to it (including CCLXXVIII), only six 18-pounders and 4.5-inch howitzers were got away as the Great Retreat began.[67][68][69][70]
By 27 March, 16th Division had been transferred to XIX Corps and had received some replacement guns, so that its own two field brigades and CCLXXVIII fielded 60 guns between them. The division made a stand at Proyart but was driven out by the heavy attacks made that day, some of the field batteries remaining in action until the enemy were only 600 yards (550 m) away. 16th (Irish) Division was pulled out of the line on 3 April, but its guns remained to cover 14th (Light) Division.[43][71][72][73][74]
14th Division came under heavy attack on 4 April (the Battle of the Avre) and fell back about 2 miles (3.2 km), but then the enemy were stopped dead by the artillery. All the batteries had been shelled heavily with HE and gas during the preliminary bombardment, and again the OPs were blinded by mist. When the German bombardment shifted to the infantry's front line trenches at 06.20, the field batteries responded by firing their pre-planned 'SOS' tasks blindly into the mist. About 11.00 the mist began to clear and the OPs brought down shrapnel fire on the massed German infantry with devastating effects. But they still came on and the commander, Royal Artillery (CRA), of 14th Division issued the order that 'This attack can and must be stopped by artillery fire. If any battery can no longer effectively stop the enemy from its present position, it will at once move fighting to a position on the crest, to engage the enemy over open sights. It is essential that the artillery should hold the line and they will do so'. As the RA historian comments, the order was obeyed: one gun of C/CCXXLVII AFA Bde 'stood in the open for two hours with no pause in its firing, and lived to tell the tale. D Battery of the same brigade smothered attack after attack with a pile of lethal gas shell which it found dumped'. All afternoon 14th Division's guns fought on until at 15.30 the enemy had withdrawn, and the CRA was able to order 'cease firing' after 10 hours continuous fighting, the guns having fired about 500 rounds each. CCLXXVII AFA brigade was itself pulled out to refit on 6 April.[75][76]
On 22 April the brigade went back into the line, attached to 56th (1st London) Division near Arras. There were no major actions, but normal trench warfare bombardments and support for small trench raids continued. On 15 July the Canadian Corps took over the sector and CCLXXVIII Bde transferred to the command of 1st Canadian Division and later 4th Canadian Division.[43][77]
Hundred Days Offensive edit
On 31 July the brigade joined 52nd (Lowland) Division, newly arrived from the Palestine, which went into the line north-east of Arras.[43][78] Then on 14 August, as the Allied Hundred Days Offensive was getting under way, it rejoined 8th Division in VIII Corps, supporting it in the Battle of the Scarpe (26–30 August).[43][48] It stayed with VIII during the autumn battles in Artois, supporting 20th (Light) Division's patrol actions from 2 to 8 October,[43][79][80] 50th (Northumbrian) Division from 8 to 13 October (including the Second Battle of Cambrai and the pursuit to the Selle)[43][81] and then from 13 October back to the 12th (Eastern) Division as it established a bridgehead across the Scheldt on 28 October. When 12th Division was relieved on 3 November[43][62] the brigade briefly went back to 52nd Division before moving to 63rd (Royal Naval) Division in XXII Corps for the Passage of the Grand Honnelle behind a massive barrage on 7 November. 63rd (RN) Division was advancing rapidly when the Armistice with Germany came into force on 11 November.[43][82][83]
After the war CCLXXVII Brigade was demobilised in 1919.[28]
2/3rd West Lancashire Brigade, RFA edit
Training for the 2/3rd West Lancashire Brigade was seriously delayed by lack of arms and equipment. Finally, in June 1915 it received two obsolete 15-pounder Mk I guns (without sights). In September 1915 it was designated CCLXXXVII (or 287th) Brigade, reorganised into A, B, C (H) and D (H) Btys. It moved from Weeton Camp in Lancashire to join 57th (2nd WL) Division at Canterbury where it took over BLC 15-pounders and BL 5-inch howitzers from the 1st Line. Now serious training could begin. In December the divisional artillery received its first 18-pounders, and in January 1916 the 4.5-inch howitzers arrived.[30][31][36]
Until the middle of 1916, 57th (2nd WL) Division formed part of Second Army, Central Force, in home defence. By July it had transferred to the emergency reserves and moved into Aldershot Command's area in Hampshire. On 5 January 1917 the War Office ordered it to France, embarkation beginning on 6 February. CCLXXXVII Brigade, consisting of two 6-gun 18-pounder batteries (A and B) and two 4-gun howitzer batteries (C (H) and D (H)), disembarked at Le Havre on 9 February, but it was immediately broken up. Batteries and sections were distributed to brigades within 57th (2nd WL), 59th (2nd North Midland) and 66th (2nd East Lancashire) Divisions and to AFAs. Brigade HQ joined 57th Divisional Ammunition Column on 20 February and the brigade ceased to exist.[28][30][31][36]
Interwar edit
After the war 3rd West Lancashire Brigade was reformed in 55th (West Lancashire) Infantry Division in 1920, but with its batteries renumbered 9th–12th Lancashire Btys. When the TF was reorganised as the Territorial Army (TA) in 1921, the brigade was redesignated 89th (3rd West Lancashire) Brigade, RFA (then as a 'Field Brigade, RA', when the RFA was subsumed into the Royal Artillery (RA) in 1924) and with batteries renumbered again:[4][11][23][84][85]
- 353 (12th West Lancashire) Bty at Liverpool
- 354 (13th West Lancashire) Bty at Garston
- 355 (14th West Lancashire) Bty at Widnes
- 356 (27th West Lancashire) Bty (Howitzer) at Liverpool
70th (3rd West Lancashire) HAA Regiment edit
In the late 1930s the need for improved anti-aircraft (AA) defences for Britain's cities became apparent, and a programme of converting existing TA units was pushed forward. In October 1937 89th Field Brigade became 70th (3rd West Lancashire) Anti-Aircraft Brigade, RA ('Anti-Aircraft Regiment' from 1 January 1939) with the following organisation:[4][11][23][84][86][87]
- HQ at Tramway Road, Aigburth, Liverpool
- 211 (13th West Lancashire) AA Bty at Tramway Road, Aigburth, Liverpool
- 212 (27th West Lancashire) AA Bty at Tramway Road, Aigburth, Liverpool
- 216 (14th West Lancashire) AA Bty at Peel House Lane, Widnes
- 225 (12th West Lancashire) Light AA Bty at Tramway Road, Aigburth, Liverpool
- 267 (Wirral) AA Bty raised at Birkenhead November 1938
- 309 AA Bty raised at Bootle on 1 April 1939
The Tramway Road drill hall was shared with the Lancashire Fortress Royal Engineers.[11]
By the outbreak of war, 267 (Wirral) AA Bty had left to become the cadre for a new 93rd AA Regiment at Birkenhead, raised from the shipping, insurance and bank offices in Liverpool. This regiment later served in the Faroe Islands and the Middle East. Similarly, 225 Light AA Bty provided the cadre of a new 25th Light AA Rgt in Liverpool. This regiment later served in North Africa, Sicily and North West Europe.[4][11][23][88][89]
Second World War edit
Mobilisation and Phoney War edit
The TA's AA units were mobilised on 23 September 1938 during the Munich Crisis, with units manning their emergency positions within 24 hours, even though many did not yet have their full complement of men or equipment. The emergency lasted three weeks, and they were stood down on 13 October.[90] In February 1939 the existing AA defences came under the control of a new Anti-Aircraft Command. In June, as the international situation worsened, a partial mobilisation of the TA was begun in a process known as 'couverture', whereby each AA unit did a month's tour of duty in rotation to man selected AA gun and searchlight positions. On 24 August the whole of AA Command was fully mobilised, ahead of the declaration of war.[91]
70th (3rd West Lancs) AA Rgt mobilised at Liverpool in 33rd (Western) Anti-Aircraft Brigade, also based at Liverpool. It formed part of 4th AA Division.[28][92][93] At this point the Gun Defended Area (GDA) around Liverpool had a strength of just 19 Heavy AA (HAA) guns (3-inch, 3.7-inch and 4.5-inch), plus three guns out of action.[94] During the period of the Phoney War, the AA defences of NW England were not tested in action, and the time was spent in equipping and training the TA units. In June 1940, the Royal Artillery's AA Regiments were redesignated Heavy AA (HAA) to distinguish them from the new Light AA (LAA) regiments being formed.[4][23][86][28] By the start of the Battle of Britain, in July 1940, the number of HAA guns deployed in the Liverpool GDA had reached 52.[95][96] The first Luftwaffe attack on Liverpool came on 28 August, and there were a number of raids thereafter.[97][98][99][100]
The Blitz edit
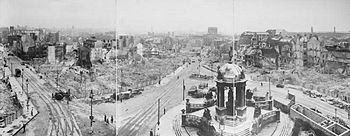

When the nightly bombing of Britain's cities The Blitz began in September 1940, 70th (3rd West Lancs) HAA Rgt was in 33 AA Bde covering Liverpool, and by the time it ended in May 1941 had transferred to 44 AA Bde covering Manchester.[101] The cities of NW England were heavily bombed during the winter of 1940–41 (the Liverpool Blitz and Manchester Blitz) and 'the actions fought [by the AA batteries] were as violent, dangerous and prolonged as any in the field'. 'On an HAA 4.5-inch position of 44th AA Brigade in Manchester, the power rammer on one gun failed. One Gunner loaded 127 of the 86-lb [40 kg] rounds himself in eleven hours of action, despite injuries to his fingers'. As the night raids continued into the Spring, Liverpool and its docks along the Mersey became the most heavily bombed area of Britain outside London, with particularly heavy attacks in December 1940 (the Christmas Blitz); in April 1941; and again the following month (the May Blitz).[102][103][104][105]
The regiment sent a cadre to 209th HAA Training Rgt at Blandford Camp to provide the basis for a new 399 Bty; this was formed on 12 December 1940 and later joined 98th HAA Rgt. The regiment sent another cadre to 209th HAA Training Rgt for a new 479 (Mixed) HAA Bty; this was formed on 11 September 1941 but was disbanded on 8 October.[86]
In the summer of 1941 the regiment was reorganised. On 20 August 309 HAA Bty left to provide an experienced cadre for a newly formed 128th HAA Rgt and was replaced in 70th (3rd West Lancs) by 434 HAA Bty, which had been formed on 12 June 1941 at the AA training centre at Oswestry, partly from the personnel of 254 and 259 LAA Btys, which had been disbanded.[86][88][28][101]

As the flow of new AA units from the training centres continued, experienced units began to be prepared for overseas service, and 70th (3rd West Lancs) was one of those chosen in early 1942. The establishment of an HAA Rgt in the field was only three batteries, so on 13 March, 434 HAA Bty transferred to 108th HAA Rgt in the Orkney and Shetland Defences. Then 70th HAA embarked for India with 211, 212 and 216 HAA Btys.[28]
India edit
The regiment arrived at Bombay on 11 May 1942, and RHQ with 211 and 212 HAA Btys made the journey across India to Madras, leaving 216 HAA Bty at Bombay. On 26 July, RHQ and 211 HAA Bty returned to Bombay, leaving 212 HAA Bty occupying the Island site at Madras under the command of 3rd Indian AA Bde. The regiment and its batteries continued to move around India's cities: on 6 December RHQ and 216 HAA Bty went to Asansol where they came under the command of 2nd Indian AA Bde, then on 27 March 1943 they went to Calcutta where they came under 1st Indian AA Bde and 212 HAA Bty rejoined. By April 1943, the regiment was back under 3 Indian AA Bde at Bombay while 216 HAA Bty was with 1 Indian AA Bde in the Calcutta area.[87][106][107][108]
Calcutta was raided regularly during the winter of 1942–43, as was the supply base at Chittagong when British forces advanced int the Arakan in December 1942. This offensive was a failure, but British forces continued to build up for the eventual reconquest of Burma. On 5 June 1943, 211 HAA Bty was sent up from Bombay to Chittagong, where it was joined by the rest of the regiment on 10 November, coming under the command of 13 AA Bde in time for Fourteenth Army's renewed offensive.[87][106][107][108][109][110]
By early 1944 the Japanese air threat to Fourteenth Army's communications was greatly reduced. On 14 May 1944 the regiment moved back to India, coming under 101 Lines of Communication (LoC) area at Piska in Ranchi district, and then via Ratu and Jubbulpore to Poona by 20 July. A manpower crisis in South East Asia Command was leading to a reduction in AA units, with many of the gunners being sent for infantry training. Between June and August 1944 the regiment was disbanded and the remaining personnel were reduced to battery strength and converted to become the 70th (West Lancashire) Medium Battery (also absorbing some personnel from 202 HAA Bty of 56th (Cornwall) HAA Rgt). The converted battery joined a newly formed 'C' Medium Regiment, designated 87th Medium Rgt from 18 August. The regiment was commanded by Lt-Col R.J. Kirton of 70th HAA Rgt. The other battery was formed by 63rd (Northumbrian) HAA Rgt.[4][23][28][86][87][106][107][111][112][113][114][115]
70th (3rd West Lancashire) Medium Battery edit

Equipped with 5.5-inch guns, the new regiment was initially under the command of 9 AA Bde at Poona, then at Secunderabad. At the end of December, it returned to Ranchi, the base of operations for the Burma Campaign, under 101 LoC area. In late March 1945, the regiment moved up through Gauhati and came under the command of the 256th LoC Sub Area when it reached Kohima on 30 March. Here, 63 Med Bty was detached from the regiment and moved independently into Burma.[107][112][115]
The rest of the regiment, with 70 (3rd West Lancs) Bty, moved to Dimapur under 202 LoC Area by the end of May. Here it was run down further, some of the personnel probably transferring to 160th Field Rgt. Although 87th Med Rgt was officially still in existence when the war ended in August 1945, 70th Med Bty had been placed in suspended animation[23][28][86][107][112][111][115]
Postwar edit
When the TA was reconstituted o 1 Januaryn 1947, the regiment was reformed at Aigburth as 470th (3rd West Lancashire) HAA Rgt.[4][23][28][86][111][113][116][117] The regiment formed part of 79 AA Bde (the wartime 53 AA Bde) at Woolton, Liverpool, in 4 AA Group at Warrington.[117][118][119][120][121]
When AA Command was disbanded in 1955, there was a significant reduction in the number of AA units in the TA: 470th HAA Rgt merged with two other Liverpool-based units, 525th LAA Rgt (descended from 25th LAA to which the old 70th had contributed a cadre in 1939, see above), and 626th (Liverpool Irish) HAA Rgt, and was reorganised as 470th (3rd West Lancashire) LAA Regiment in 2nd Army Group Royal Artillery (AA).[122][123] with the following organisation:[4][23][116][117]
- RHQ and P Btys – from 470th HAA Rgt
- Q Liverpool Irish Bty – from 626th HAA Rgt
- R Bty – from 525th LAA Rgt
In 1961 the regiment absorbed the technically trained personnel of 855 (Essex Fortress) AA Control and Reporting Bty, and in 1964 the designation was changed from 'Light Anti-Aircraft' to 'Light Air Defence'.[4][23][116][117]
When the TA was reduced into the TAVR in 1967, the regiment was amalgamated with 252nd (The Manchester Artillery) Field Rgt and 253rd (The Bolton Artillery) Field Rgt to form 103rd (Lancashire Artillery Volunteers) Rgt, RA, in which the '3rd West Lancs' heritage is continued by 208 (3rd West Lancashire) Bty.[4][23][116][117] In 1973, 208 (3rd West Lancs) Bty absorbed the cadre of the former West Lancashire Regiment, RA, which represented the lineage of the 1st and 4th West Lancashire Artillery, the Lancashire Hussars, Liverpool Scottish, and Liverpool Rifles.[23]
In 2015, the battery formed 'Isle of Man Troop' in Douglas on the isle of Man.[124]
Honorary Colonels edit
The following served as Honorary Colonel of the unit:[11]
- Robert Trimble, former CO, appointed 14 July 1875
- W.W. Gossage, former CO, appointed 1 October 1910
- Gen Sir Walter Kirke, appointed 28 April 1934
Memorial edit
In the entrance hall of the Garston Branch of the Royal British Legion there is a brass memorial plaque to 38 men of 13th Lancashire and B/277 Btys who died in WWI.[125]
Notes edit
- ^ Beckett.
- ^ Spiers, pp. 163–8.
- ^ a b c d e f Frederick, p. 664.
- ^ a b c d e f g h i j k l m n o "3rd West Lancs Artillery at Regiments.org". Archived from the original on 17 January 2006. Retrieved 17 January 2006.
- ^ a b c d e Litchfield & Westlake, pp. 107–13.
- ^ Beckett, Appendix VIII.
- ^ a b c Lancashire Record Office, Handlist 72.
- ^ London Gazette, 2 April 1860.
- ^ London Gazette, 4 December 1860.
- ^ London Gazette, 29 April 1862.
- ^ a b c d e f g h i j k l m n o Army List, various dates.
- ^ Obituary, Hawera and Normanby Star (New Zealand), 5 September 1899.
- ^ London Gazette, 26 December 1862.
- ^ London Gazette, 21 July 1863.
- ^ London Gazette, 16 February 1875.
- ^ London Gazette 13 July 1875.
- ^ London Gazette, 18 April 1890.
- ^ Litchfield & Westlake, pp. 4–5.
- ^ a b Litchfield & Westlake, p. 6.
- ^ Dunlop, Chapter 14.
- ^ Spiers, Chapter 10.
- ^ Frederick, p. 677.
- ^ a b c d e f g h i j k l m Litchfield, pp. 125–7.
- ^ London Gazette 20 March 1908.
- ^ a b c d e f g h i j Becke, Pt 2a, pp. 133–9.
- ^ a b c d e f g 55 (WL) Division at Long, Long Trail.
- ^ a b c d e f "55 (WL) Division at Regimental Warpath". Archived from the original on 10 November 2009. Retrieved 10 November 2009.
- ^ a b c d e f g h i j k l "War Service of 3rd West Lancs Artillery at Regiments.org". Archived from the original on 17 January 2006. Retrieved 17 January 2006.
- ^ Coop, p. 12.
- ^ a b c d e Becke, Pt 2b, pp. 1–7.
- ^ a b c 57 (2nd WL) Division at Long, Long Trail.
- ^ Coop, p. 23.
- ^ Becke, Pt 3a, pp. 79–85.
- ^ 18 (E) Division at Long, Long Trail.
- ^ Coop, pp. 28–9.
- ^ a b c d Frederick, p. 689.
- ^ Coop, pp. 25, 30.
- ^ Coop. pp. 31–5.
- ^ Farndale, Western Front, p. 150.
- ^ Coop. pp. 35–40.
- ^ Coop, pp. 41–44.
- ^ Farndale, Western Front, p. 152.
- ^ a b c d e f g h i j k l m n o p 'Allocations of Army Brigades, RH & RFA', The National Archives (TNA), Kew, file WO 95/5494/2.
- ^ Farndale, Western Front, Annex D.
- ^ Becke, Pt 3b, pp. 91–100.
- ^ 39 Division at Long, Long Trail.
- ^ Farndale, Western Front, pp. 184–91.
- ^ a b Becke, Pt 1, p. 95.
- ^ Farndale, Western Front, pp. 195–204.
- ^ Heinz Hagenlucke, 'The German High Command', in Liddle (ed), p. 51.
- ^ Wolff, pp. 155–63.
- ^ Becke, Pt 3a, pp. 85, 141.
- ^ Farndale, Western Front, p. 204.
- ^ Ashley Ekins, 'The Australians at Passchendaele', in Liddle (ed), p. 232.
- ^ John Lee, 'The British Divisions at Third Ypres', in Liddle (ed), p. 217.
- ^ Frank E. Vandiver, 'Field Marshal Sir Douglas Haig and Passchendaele', in Liddle (ed), p. 37.
- ^ Becke, Pt 3a, p. 93.
- ^ Ekins in Liddle (ed), pp. 233–43.
- ^ Farndale, Western Front, pp. 205–12.
- ^ Lee in Liddle (ed), pp. 219–22.
- ^ Wolff, pp. 191–4, 198-9, 207-8, 222–35, 249–51.
- ^ a b Becke, Pt 3a, p. 33.
- ^ Cooper, pp. 63–4, 96, 111, 115.
- ^ Farndale, Western Front, pp. 216–23.
- ^ Cooper, pp. 167–70, 177–8, 192–3.
- ^ Farndale, Western Front, pp. 249–57.
- ^ Blaxland, pp. 46–7, 57, 64.
- ^ Farndale, Western Front, p. 264.
- ^ Middlebrook, pp. 209–12, 224–5 237.
- ^ Murland, pp. 91–7.
- ^ Becke, Pt 2a, p. 69.
- ^ Blaxland, pp. 89–92.
- ^ Farndale, Western Front, pp. 273–6.
- ^ Murland, p. 187.
- ^ Blaxland, p. 104.
- ^ Farndale, Western Front, pp. 276–8.
- ^ Dudley Ward, pp. 246–252.
- ^ Becke, Pt 2a, p. 115.
- ^ Becke, Pt 3a, p. 101.
- ^ Edmnds & Maxwell-Hyslop, pp. 128–30.
- ^ Becke, Pt 2a, p. 100.
- ^ Becke, Pt 3b, p. 128.
- ^ Edmonds & Maxwell-Hyslop, pp. 512, 525–6, 535, 553.
- ^ a b Frederick, p. 523.
- ^ Titles & Designations, 1927.
- ^ a b c d e f g Frederick, pp. 755–9, 773.
- ^ a b c d 70 HAA Rgt at RA 1939–45.
- ^ a b Frederick, pp. 803, 824.
- ^ Litchfield, pp. 32, 131.
- ^ Routledge, pp. 62–3.
- ^ Routledge, pp. 65–6, 371.
- ^ AA Command 3 September 1939 at Patriot Files
- ^ Routledge, Table LX, p. 378.
- ^ Routledge, Table LVIII, p. 376; Table LIX p. 377.
- ^ Farndale, p. 106.
- ^ Collier, Appendix IX.
- ^ Collier, Chapter XIII.
- ^ Collier, Chapter XVI.
- ^ Collier, Appendix XIV.
- ^ Collier, Appendix XV.
- ^ a b Order of Battle of Non-Field Force Units in the United Kingdom, Part 27: AA Command, 12 May 1941, with amendments, TNA file WO 212/79.
- ^ Routledge, pp. 394–5.
- ^ Liverpool Bitz at History of Liverpool
- ^ Collier, Chapter XVII.
- ^ Collier, Appendix XXX.
- ^ a b c Joslen, p. 520.
- ^ a b c d e Farndale, Far East, Annex K.
- ^ a b Routledge, Table XXXVII, pp. 252–3.
- ^ Routledge, pp. 237–9.
- ^ Woodburn Kirby, Vol II, pp. 259–60.
- ^ a b c Frederick, p. 740.
- ^ a b c Joslen, p 513.
- ^ a b Farndale, Years of Defeat, Annex M.
- ^ Routledge, p. 244; Table XXXIX, p. 255.
- ^ a b c 87 Med Rgt at RA 1939–45.
- ^ a b c d Frederick, pp. 1016–7.
- ^ a b c d e 444–473 Rgts RA at British Army 1945 on.
- ^ Routledge, Table LXXIV, p. 441.
- ^ Litchfield, Appendix 5.
- ^ Watson, TA 1947.
- ^ 67–106 AA Bdes at British Army 1945 on.
- ^ Routledge, Table LXXV, p. 442.
- ^ AGRAs at British Army 1945 onwards.
- ^ "Isle of Man Welcomes First Reserve Unit For 50 Years". Forces Network. 30 September 2015. Retrieved 27 August 2021.
- ^ IWM War Memorial Register Ref 15515.
References edit
- Maj A.F. Becke,History of the Great War: Order of Battle of Divisions, Part 1: The Regular British Divisions, London: HM Stationery Office, 1934/Uckfield: Naval & Military Press, 2007, ISBN 1-847347-38-X.
- Maj A.F. Becke,History of the Great War: Order of Battle of Divisions, Part 2a: The Territorial Force Mounted Divisions and the 1st-Line Territorial Force Divisions (42–56), London: HM Stationery Office, 1935/Uckfield: Naval & Military Press, 2007, ISBN 1-847347-39-8.
- Maj A.F. Becke,History of the Great War: Order of Battle of Divisions, Part 2b: The 2nd-Line Territorial Force Divisions (57th–69th), with the Home-Service Divisions (71st–73rd) and 74th and 75th Divisions, London: HM Stationery Office, 1937/Uckfield: Naval & Military Press, 2007, ISBN 1-847347-39-8.
- Maj A.F. Becke,History of the Great War: Order of Battle of Divisions, Part 3a: New Army Divisions (9–26), London: HM Stationery Office, 1938/Uckfield: Naval & Military Press, 2007, ISBN 1-847347-41-X.
- Maj A.F. Becke,History of the Great War: Order of Battle of Divisions, Part 3b: New Army Divisions (30–41) and 63rd (R.N.) Division, London: HM Stationery Office, 1939/Uckfield: Naval & Military Press, 2007, ISBN 1-847347-41-X.
- Ian F.W. Beckett, Riflemen Form: A Study of the Rifle Volunteer Movement 1859–1908, Aldershot: Ogilby Trusts, 1982, ISBN 0 85936 271 X.
- Gregory Blaxland, Amiens: 1918, London: Frederick Muller, 1968/Star, 1981, ISBN 0-352-30833-8.
- Basil Collier, History of the Second World War, United Kingdom Military Series: The Defence of the United Kingdom, London: HM Stationery Office, 1957.
- Rev J.O. Coop, The Story of the 55th (West Lancashire) Division, Liverpool: Daily Post Printers, 1919/Uckfield: Naval & Military Press, 2002, ISBN 978-1843422631.
- Col John K. Dunlop, The Development of the British Army 1899–1914, London: Methuen, 1938.
- Brig-Gen Sir James E. Edmonds & Lt-Col R. Maxwell-Hyslop, History of the Great War: Military Operations, France and Belgium 1918, Vol V, 26th September–11th November, The Advance to Victory, London: HM Stationery Office, 1947/Imperial War Museum and Battery Press, 1993, ISBN 1-870423-06-2.
- Gen Sir Martin Farndale, History of the Royal Regiment of Artillery: Western Front 1914–18, Woolwich: Royal Artillery Institution, 1986, ISBN 1-870114-00-0.
- Gen Sir Martin Farndale, History of the Royal Regiment of Artillery: The Years of Defeat: Europe and North Africa, 1939–1941, Woolwich: Royal Artillery Institution, 1988/London: Brasseys, 1996, ISBN 1-85753-080-2.
- Gen Sir Martin Farndale, History of the Royal Regiment of Artillery: The Far East Theatre 1939–1946, London: Brasseys, 2002, ISBN 1-85753-302-X.
- J.B.M. Frederick, Lineage Book of British Land Forces 1660–1978, Vol II, Wakefield, Microform Academic, 1984, ISBN 1-85117-009-X.
- Peter H. Liddle (ed), Passchendaele in Perspective: The Third Battle of Ypres, London: Leo Cooper, 1997, ISBN 0-85052-552-7.
- Norman E.H. Litchfield, The Territorial Artillery 1908–1988 (Their Lineage, Uniforms and Badges), Nottingham: Sherwood Press, 1992, ISBN 0-9508205-2-0.
- Norman Litchfield & Ray Westlake, The Volunteer Artillery 1859–1908 (Their Lineage, Uniforms and Badges), Nottingham: Sherwood Press, 1982, ISBN 0-9508205-0-4.
- Martin Middlebrook, The Kaiser's Battle, 21 March 1918: The First Day of the German Spring Offensive, London: Allen Lane, 1978/Penguin, 1983, ISBN 0-14-017135-5.
- Jerry Murland, Retreat and Rearguard Somme 1918: The Fifth Army Retreat, Barnsley: Pen & Sword, 2014, ISBN 978-1-78159-267-0.
- Edward M. Spiers, The Army and Society 1815–1914, London: Longmans, 1980, ISBN 0-582-48565-7.
- Titles and Designations of Formations and Units of the Territorial Army, London: War Office, 7 November 1927 (RA sections also summarised in Litchfield, Appendix IV).
- Maj C.H. Dudley Ward, The Fifty Sixth Division, 1st London Territorial Division, 1914–1918, London: John Murray, 1921/Uckfield: Naval & Military Press, 2001, ISBN 978-1-843421-11-5.
- Leon Wolff, In Flanders Fields: The 1917 Campaign, London: Longmans, 1959/Corgi, 1966.
- Maj-Gen S. Woodburn Kirby, History of the Second World War, United Kingdom Military Series: The War Against Japan Vol II, India's Most Dangerous Hour, London: HM Stationery Office, 1958/Uckfield: Naval & Military, 2004, ISBN 1-845740-61-0.
External sources edit
- British Army units from 1945 on
- Imperial War Museum, War Memorials Register
- Lancashire Record Office, Handlist 72
- The Long, Long Trail
- Orders of Battle at Patriot Files
- Land Forces of Britain, the Empire and Commonwealth – Regiments.org (archive site)
- The Regimental Warpath 1914–1918 (archive site)
- Graham Watson, The Territorial Army 1947