


Summary
Road signs in Australia are regulated by each state's government, but are standardised overall throughout the country. In 1999, the National Transport Commission, or NTC, created the first set of Rules of the Road for Australia.[1] Official road signs by standard must use the AS1744 series fonts, based on the US' Highway Gothic typeface.

Australia closely follows the United States when it comes to road sign designing practices (for example, using yellow diamonds for warning signs and green direction signs), but some types of road signs in Australia, such as road signs for speed limits, roadworks, "reduce speed" signs, and chevron arrow-styled direction signs are influenced by the usage in the United Kingdom.[citation needed]
History edit
The very first standardised road signs in Australia used yellow circular signs as regulatory signs, a feature now preserved in "pedestrian crossing" and "safety zone" signs.[2]
In 1964, Australia adopted a variation of the American Manual on Uniform Traffic Control Devices (MUTCD) road sign design, which is a modified version of the 1954 revised version of the 1948 American edition of the MUTCD.[3][4] The Australian adopted version had differences from the American version that it used red "give way" signs instead of yellow "yield" signs, "no entry" instead of "do not enter", round pedestrian crossing road signs (a carryover from the early days), the adoption of some road signage designs from the United Kingdom, and the use of imperial system of units (miles and yards) as in the UK as opposed to the customary system of units (miles and feet) in the US.
The year of 1974 saw important changes in Australia's road sign design practices. A major change expressed Australia's preference for a transition to adoption of symbols on signs in lieu of words, inspired by the Vienna Convention on Road Signs and Signals, and transition to adoption of kilometres and metres in lieu of miles and yards.[5][6] This change aligned with Australia's large-scale adoption of the metric system. Australian speed limit signs with red circle as a legend were placed in numbers greater than the numbers on those containing the legend "SPEED LIMIT".[5] Speedometers on Australian vehicles were not required but encouraged to alter or replace the speedometer part so that it is shown in kilometres per hour.[5] Except for bridge-clearance and flood-depth signs, dual marking was not used.
To avoid confusion as to whether the distance indicated was in miles or kilometres new major distance signs had affixed to them a temporary yellow plate showing the symbol km.[5] On the many new kilometre signs on minor roads, a yellow plate which showed the corresponding number of miles was affixed under the now permanent kilometre distance indication. These temporary plates were removed between 1975 and 1976.
Since 1974, Australia had the notable distinction of keeping the text-based low clearance warning sign, as most countries around the world now use symbolic versions.[citation needed] If further research on Australian road signage is given, the text-based low clearance sign would be gone before the 2030s.[citation needed]
Regulatory signs edit
Regulatory signs inform drivers of traffic laws and banned actions. Road users must obey all instructions on prohibitory signs or risk getting a fine and points deducted from their licence.[7] Local councils may have local restrictions relating to parking times, which would be shown on or near the sign.
-
 (R1-1) Stop
 -
 (R1-2) Give Way
 -
 (R1-3) Give way at roundabout
 -
 (R1-4) Stop when Traffic signals are off or flashing (used in New South Wales)
 -
 (R1-V6) Give Way to Stock (used in Victoria)
 -
 (R2-2) One Way (left)
 -
 (R2-2) One Way (right)
 -
 (R2-3) Keep Left
 -
 (R2-3) Keep Right
 -
 (R2-4) No Entry (excluding the Australian Capital Territory, New South Wales and the Northern Territory)
 -
 (R2-4) No Entry (used in the Australian Capital Territory, New South Wales, Queensland and the Northern Territory)
 -
 (R2-5) No U-turn (excluding the Australian Capital Territory, New South Wales and the Northern Territory)
 -
 (R2-5) No U-turn (used in the Australian Capital Territory, New South Wales, Queensland, Victoria, and the Northern Territory)
 -
 (R2-6) No Left Turn (excluding the Australian Capital Territory, New South Wales and the Northern Territory)
 -
 (R2-6) No Left Turn (used in the Australian Capital Territory, New South Wales, Queensland and the Northern Territory)
 -
 (R2-6) No Right Turn (excluding the Australian Capital Territory, New South Wales and the Northern Territory)
 -
 (R2-6) No Right Turn (used in the Australian Capital Territory, New South Wales, Queensland and the Northern Territory)
 -
 (R2-7) No Turns (Straight Only)
 -
 (R2-9) Left Lane Must Turn Left
 -
 (R2-9) Right Lane Must Turn Right
 -
 (R2-10) Give Way to Pedestrians
 -
 (R2-11) Two-way Traffic
 -
 (R2-14) Turn Left
 -
 (R2-14) Turn Right
 -
 (R2-15) U-turn Permitted
 -
 (R2-16) Turn Left at Any Time with Care
 -
 (R2-17) One Way (forward)
 -
 (R2-19) Left Lane Must Exit
 -
 (R2-20) Left Turn on Red Permitted after Stopping
 -
 (R2-21) Right Turn from Left Only
 -
 (R2-V21-1) Right Turn from Left Ahead (used in Victoria and Gold Coast, Queensland)
 -
 (R2-22) No hook turn by Bicycles
 -
 (R2-Q02) Through Traffic Keep Left (used in Queensland)
 -
 (R2-V115) U-turn Must Give Way (used in Victoria)
 -
 (R2-V122) Keep Left at Islands (used in Victoria)
 -
 (R2-V124) Give Way to Merging Tram (used in Victoria)
 -
 (R3-1) Pedestrian Crossing
 -
 (R3-1) Pedestrian Crossing (with target board, used in Queensland)
 -
 (R3-2) Safety Zone (excluding the Australian Capital Territory and New South Wales)
 -
 (R3-3) Children Crossing (flags are displayed near crossings around schools, orange variant, excluding the Northern Territory)
 -
 (R3-3) Children Crossing (flags are displayed near crossings around schools, pink variant, used in the Northern Territory)
 -
 (R3-4) Children Crossing Speed Limit when Lights Flashing
 -
 (R3-5) Pedestrians may Cross Diagonally (left)
 -
 (R3-5) Pedestrians may Cross Diagonally (right)
 -
 (R3-V102) Pedestrians use Overpass (used in Victoria)
 -
 (R3-Q01) Walk to Island and Wait for Further Signal (used in Queensland)
 -
 (MR-RP-8) No Pedestrian Crossing (used in Western Australia)
 -
 (R4-1) 10 km/h Speed Limit
 -
 (R4-1) 20 km/h Speed Limit
 -
 (R4-1) 25 km/h Speed Limit
 -
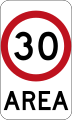
 (R4-1) 30 km/h Speed Limit
 -
 (R4-1) 40 km/h Speed Limit
 -
 (R4-1) 50 km/h Speed Limit
 -
 (R4-1) 60 km/h Speed Limit
 -
 (R4-1) 70 km/h Speed Limit
 -
 (R4-1) 80 km/h Speed Limit
 -
 (R4-1) 90 km/h Speed Limit
 -
 (R4-1) 100 km/h Speed Limit
 -
 (R4-1) 110 km/h Speed Limit
 -
 (R4-1) 130 km/h Speed Limit (used in the Northern Territory)
 -
 (R4-1) 60 km/h Community Gateway Speed Limit (used in Victoria)
 -
 (R4-2) Speed De-restriction
 -
 (R4-3) Road Work
 -
 (R4-4) Shared Zone
 -
 (R4-5) End of Shared Zone
 -
 (R4-6) Local Traffic Area
 -
 (R4-10) 20 km/h Speed Limit Zone Area
 -
 (R4-10) 30 km/h Speed Limit Zone Area
 -
 (R4-10) 40 km/h Speed Limit Zone Area
 -
 (R4-10) 50 km/h Speed Limit Zone Area
 -
 (R4-10) 60 km/h Speed Limit Zone Area
 -
 (R4-11) End of 20 km/h Speed Limit Zone Area
 -
 (R4-11) End of 30 km/h Speed Limit Zone Area
 -
 (R4-11) End of 40 km/h Speed Limit Zone Area
 -
 (R4-11) End of 50 km/h Speed Limit Zone Area
 -
 (R4-11) End of 60 km/h Speed Limit Zone Area
 -
 (R4-12) End of 10 km/h Speed Limit
 -
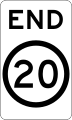 (R4-12) End of 20 km/h Speed Limit
 -
 (R4-12) End of 25 km/h Speed Limit
 -
 (R4-12) End of 30 km/h Speed Limit
 -
 (R4-12) End of 40 km/h Speed Limit
 -
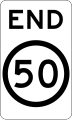 (R4-12) End of 50 km/h Speed Limit
 -
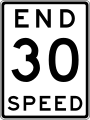
 (R4-12) End of 60 km/h Speed Limit
 -
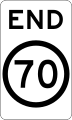 (R4-12) End of 70 km/h Speed Limit
 -
 (R4-12) End of 80 km/h Speed Limit
 -
 (R4-12) End of 90 km/h Speed Limit
 -
 (R4-12) End of 100 km/h Speed Limit
 -
 (R4-12) End of 110 km/h Speed Limit
 -
 (R4-V100) Service Road (used in Victoria)
 -
 (R4-V105) 40 km/h Speed Limit School Zone (used in Victoria)
 -
 (R4-V105) 60 km/h Speed Limit School Zone (used in Victoria)
 -
 (R4-V106) 40 km/h Speed Limit School Zone (used in Victoria)
 -
 (R4-V106) 60 km/h Speed Limit School Zone (used in Victoria)
 -
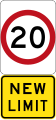
 (R4-V111) New Speed Limit Ahead (used in Victoria and Western Australia)
 -
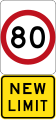
 (R4-V119) New Limit (used in Victoria and Queensland)
 -
 (R4-201) On Bridge (used in New South Wales)
 -
 (R4-205) State Speed Limit (used in New South Wales)
 -
 (R4-212) 20 km/h Roadwork Speed Limit (used in New South Wales)
 -
 (R4-212) 40 km/h Roadwork Speed Limit (used in New South Wales)
 -
 (R4-212) 60 km/h Roadwork Speed Limit (used in New South Wales)
 -
 (R4-212) 80 km/h Roadwork Speed Limit (used in New South Wales)
 -
 (R4-220) End of Truck and Bus Speed Limit (used in New South Wales)
 -
 (R4-225-1) Speed Limit Ahead (used in New South Wales)
 -
 (R4-229) Truck and Bus Speed Limit (used in New South Wales)
 -
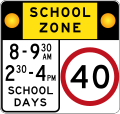
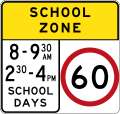
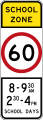
 (R4-230) School Zone (used in New South Wales)
 -
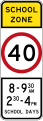
 (R4-230-1) School Zone (used in New South Wales)
 -
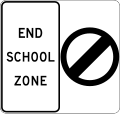
 (R4-231) End of School Zone (used in New South Wales)
 -
 (R4-235) School Zone (Non-standard school operating hours, used in New South Wales)
 -
 (R4-235-1) School Zone (Non-standard school operating hours, used in New South Wales)
 -
 (R4-239) Speed Limit unless Raining (used in New South Wales)
 -
 (R4-242) Bus Speed Limit (used in New South Wales)
 -
 (R4-243) End of Bus Speed Limit (used in New South Wales)
 -
 (R4-244-1) School Zone Ahead (used in New South Wales)
 -
 (R4-246) Speed Limits per Category (used in New South Wales)
 -
 (R4-Q01) School Zone (used in Queensland)
 -
 (R4-Q03) School Zone Ahead (used in Queensland)
 -
 (R4-Q04) School Zone (used at T-junctions) (used in Queensland)
 -
 (R4-Q05) Road Train Speed Limit (used in Queensland)
 -
 (R4-Q06) End of Road Train Speed Limit (used in Queensland)
 -
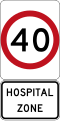
 (R4-Q07) Hospital Zone (used in Queensland)
 -
 (MR-RS-20) End of Speed Limit Area (used in Western Australia)
 -
 (R5-1) Parking Permitted: 1 Hour (1 time of parking)
 -
 (R5-2) Parking Permitted: 2 Hours (2 times of parking)
 -
 (R5-10) Parking Permitted: No Limit
 -
 (R5-12) Parking Permitted: 2 Minutes
 -
 (R5-13) Parking Permitted: 5 Minutes
 -
 (R5-14) Parking Permitted: 10 Minutes
 -
 (R5-15) Parking Permitted: 15 Minutes
 -
 (R5-16) Parking Permitted: Half Hours
 -
 (R5-17) Parking Permitted: 1 and a Half Hours
 -
 (R5-20) Bus Zone
 -
 (R5-21) Taxi Zone
 -
 (R5-22) Permit Zone
 -
 (R5-23) Loading Zone
 -
 (R5-24) Truck Zone
 -
 (R5-25) Works Zone
 -
 (R5-26) Mail Zone
 -
 (R5-35) No Stopping
 -
 (R5-35) No Stopping (used in the Australian Capital Territory)
 -
 (R5-36) No Stopping at times
 -
 (R5-36) No Stopping (School times)
 -
 (R5-39) Tow-Away Area
 -
 (R5-40) No Parking
 -
 (R5-40) No Parking (used in the Australian Capital Territory)
 -
 (R5-41) No Parking at Times
 -
 (R5-45) Clearway
 -
 (R5-46) Clearway at times
 -
 (R5-51) End Clearway
 -
 (R5-58) Emergency Stopping Lane Only
 -
 (R5-61) 2 Hour Parking Area
 -
 (R5-62) 2 Hour Parking Area
 -
 (R5-63) End of 2 Hour Parking Area
 -
 (R5-64) Area Parking Control Ahead
 -
 (R5-65) Park in Bays Only
 -
 (R5-71) No Stopping Area
 -
 (R5-72) No Stopping Area
 -
 (R5-73) End of No Stopping Area
 -
 (R5-81) No Parking Area
 -
 (R5-82) No Parking Area
 -
 (R5-83) End of No Parking Area
 -
 (R5-V103) New Clearway Times (used in Victoria)
 -
 (R5-V104) New Times (used in Victoria)
 -
 (R5-400) No Stopping (used in New South Wales)
 -
 (R5-405) No Stopping (Taxis Excepted) (used in New South Wales)
 -
 (R5-406) Taxi Pick-up Point (used in New South Wales)
 -
 (R5-Q01) Tow-Away Zone (used in Queensland)
 -
 (R5-Q04) Loading Zone (Maximum of 2 Minutes for Passengers) (used in Queensland)
 -
 (R5-Q05) Loading Zone (Maximum of 20 Minutes for Commercial Vehicles) (used in Queensland)
 -
 (R6-1) No Overtaking or Passing (used at bottlenecks)
 -
 (R6-2) No Overtaking on Bridge
 -
 (R6-3) Bridge Load Limit
 -
 (R6-4) Gross Load Limit
 -
 (R6-5) End Load Limit
 -
 (R6-6) Stop Here on Red Signal
 -
 (R6-7) Hand Held Stop Sign (for children crossings)
 -
 (R6-8) Hand Held Stop Sign (for roadworks)
 -
 (R6-9) Stop on Red Signal
 -
 (R6-10-1) No Buses
 -
 (R6-10-2) No Trucks
 -
 (R6-10-3) No Bicycles
 -
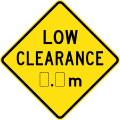
 (R6-11) Low Clearance Marker
 -
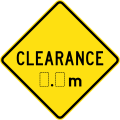
 (R6-12) Clearance Marker
 -
 (R6-13) Prohibited on Freeways
 -
 (R6-14) Stop Here on Red Arrow
 -
 (R6-15) No Pedestrians
 -
 (R6-17) Bridge Load Limit (Per Axle Group)
 -
 (R6-18) Buses Must Enter (Checking stations and weighbridges are set up on roads for buses to check their weight and length)
 -
 (R6-19) Start Freeway
 -
 (R6-20) Freeway Entrance
 -
 (R6-21) End Freeway
 -
 (R6-19) Start Motorway
 -
 (R6-20) Motorway Entrance
 -
 (R6-21) End Motorway
 -
 (R6-V19-2) Start Tollway (used in Victoria)
 -
 (R6-V20-2) Tollway Entrance (used in Victoria)
 -
 (R6-V21-2) End Tollway (used in Victoria)
 -
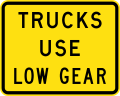
 (R6-22) Trucks & Buses Must Use Low Gear
 -
 (R6-23) End Truck & Bus Low Gear Area
 -
 (R6-24) Railway Crossing
 -
 (R6-25) Railway Crossing (with red backing board)
 -
 (R6-26) Tramway Crossing (used in Adelaide and Melbourne)
 -
 (R6-26) Tramway Crossing (with red backing board) (used in Adelaide and Melbourne)
 -
 (R6-27) Trucks Must Enter (Checking stations and weighbridges are set up on roads for trucks to check their weight and length)
 -
 (R6-28) Trucks Use Left Lane
 -
 (R6-29) Keep Left Unless Overtaking
 -
 (R6-30) Median Turning Lane
 -
 (R6-31) Give Way to Buses (Attached to a bus)
 -
 (R6-32) End Keep Left Unless Overtaking
 -
 (R6-33) Overall Length Limit
 -
 (R6-249) Wet weather speed limit ahead
 -
 (R6-256) Stop Here On Red Arrow, Otherwise turn left with care
 -
 (R6-V106) Truck restriction ends (used in Victoria)
 -
 (R6-Q01) Prohibited on Motorways (used in Queensland)
 -
 (R7-1-1) Bus Lane
 -
 (R7-1-3) Truck Lane
 -
 (R7-1-4) Bicycle Lane
 -
 (R7-1-5) Tram Lane
 -
 (R7-2) Ahead (used with bus, transit or truck lane signs)
 -
 (R7-3) Left Lane (used with bus, transit or truck lane signs)
 -
 (R7-4) End
 -
 (R7-5) Lane Clearance
 -
 (R7-7-1) T2 Transit Lane (you must have 2 or more people in the vehicle)
 -
 (R7-7-2) T3 Transit Lane (you must have 3 or more people in the vehicle)
 -
 (R7-7-3) T2 Transit Lane Restriction (2 people or more (1 driver, 1 passenger))
 -
 (R7-7-4) T2 Transit Lane Restriction (2 people or more (1 driver, 1 passenger))
 -
 (R7-7-5) T3 Transit Lane Restriction (3 people or more (1 driver, 2 passengers))
 -
 (R7-7-6) T3 Transit Lane Restriction (3 people or more (1 driver, 2 passengers))
 -
 (R7-V7) Transit Lane (used in Victoria)
 -
 (R7-8) Buses Only
 -
 (R7-9-1) End of T2 Transit Lane
 -
 (R7-9-2) End of T3 Transit Lane
 -
 (R7-V9) End of Transit Lane (used in Victoria)
 -
 (R7-Q01) Ahead on Side Road (left) (used with bus, transit or truck lane signs) (used in Queensland)
 -
 (R7-Q01) Ahead on Side Road (right) (used with bus, transit or truck lane signs) (used in Queensland)
 -
 (R7-Q04) Bus Lane Ahead (used in Queensland)
 -
 (R7-V101-1) Part Time Tram Lane (used in Victoria)
 -
 (R7-V104) Tram Lane Ahead (used in Victoria)
 -
 (R7-V132) Merge left with times (used before a part-time tram lane) (used in Victoria)
 -
 (R7-V133) Tram Only (used in Victoria)
 -
 (R8-1) Bicycles Only
 -
 (R8-2) Shared Path
 -
 (R8-3) Separated Path
 -
 (R9-1-1) Time of Operation (Single time) (used with No u-turn, No left turn, No right turn or No turns signs)
 -
 (R9-1-2) Time of Operation (Double times) (used with No u-turn, No left turn, No right turn or No turns signs)
 -
 (R9-1-3) At All Times
 -
 (R9-2) Buses Excepted
 -
 (R9-3) Bicycles Excepted
 -
 (R9-4) Authorised Vehicles Excepted
 -
 (R9-6-1) Distance (in metres) (used with No u-turn, No left turn, No right turn or No turns signs)
 -
 (R9-6-2) Distance (in metres) (used with No u-turn, No left turn, No right turn or No turns signs)
 -
 (R9-7-1) Distance (in kilometres) (used with No u-turn, No left turn, No right turn or No turns signs)
 -
 (R9-7-2) Distance (in kilometres) (used with No u-turn, No left turn, No right turn or No turns signs)
 -
 (R9-8) At Street Name (used with No u-turn, No left turn, No right turn or No turns signs)
 -
 (R9-9) One Lane
 -
 (R9-233) Narrow Lanes (used in New South Wales)
 -
 (R9-234) Slippery Surface (used in New South Wales)
 -
 (R9-236) Railway Crossing (used in New South Wales)
 -
 (R9-V101-2) Buses, Taxis, VHA/B/C Excepted (used in Victoria)
 -
 (R9-V106) Trams Excepted (used in Victoria)
 -
 (R9-Q01) Buses and Taxis Excepted (used in Queensland)
 -
 (R9-Q02) Trucks Excepted (used in Queensland)
 -
 (R9-Q03) Police Excepted (used in Queensland)
 -
 Ramp Speed (used in Queensland)
 -
 Speed Limit in my Street (used in Queensland)


Combo signs edit
-
 20 km/h Roadwork Speed Limit
 -
 40 km/h Roadwork Speed Limit
 -
 60 km/h Roadwork Speed Limit
 -
 80 km/h Roadwork Speed Limit
 -
 Service Road Speed Limit (used in Victoria)
 -
 New 10 km/h Speed Limit (used in South Australia)
 -
 New 20 km/h Speed Limit (used in South Australia)
 -
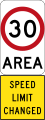
 New 30 km/h Speed Limit (used in South Australia)
 -
 New 40 km/h Speed Limit (used in South Australia)
 -
 New 50 km/h Speed Limit (used in South Australia)
 -
 New 60 km/h Speed Limit (used in South Australia)
 -
 New 70 km/h Speed Limit (used in South Australia)
 -
 New 80 km/h Speed Limit (used in South Australia)
 -
 New 90 km/h Speed Limit (used in South Australia)
 -
 New 100 km/h Speed Limit (used in South Australia)
 -
 New 10 km/h Speed Limit (used in Victoria)
 -
 New 20 km/h Speed Limit (used in Victoria)
 -
 New 30 km/h Speed Limit (used in Victoria)
 -
 New 40 km/h Speed Limit (used in Victoria)
 -
 New 50 km/h Speed Limit (used in Victoria)
 -
 New 60 km/h Speed Limit (used in Victoria)
 -
 New 70 km/h Speed Limit (used in Victoria)
 -
 New 80 km/h Speed Limit (used in Victoria)
 -
 New 90 km/h Speed Limit (used in Victoria)
 -
 New 100 km/h Speed Limit (used in Victoria)
 -
 Speed Limit on Bridge (used in New South Wales)
 -
 Narrow Lane Speed Limit (used in New South Wales)
 -
 Slippery Surface Speed Limit (used in New South Wales)
 -
 Railway Crossing Speed Limit (used in New South Wales)
 -
 Hospital Zone Speed Limit (used in Queensland)
 -
 Ramp Speed Limit (used in Queensland)
 -
 End of Speed Limit Area (Speed Limit is now effect) (used in Western Australia)
 -
 New 20 km/h Speed Limit Area (used in South Australia)
 -
 New 30 km/h Speed Limit Area (used in South Australia)
 -
 New 40 km/h Speed Limit Area (used in South Australia)
 -
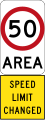 New 50 km/h Speed Limit Area (used in South Australia)
 -
 New 60 km/h Speed Limit Area (used in South Australia)


Warning signs edit
Warning signs let drivers know that road changes are coming up on the drive. These can be permanent or temporary traffic hazards and obstacles. They use the yellow diamond design.
-
 (W1-1) 90 Sharp turn, to left
 -
 (W1-1) 90 Sharp turn, to right
 -
 (W1-2) Double sharp curve first to left
 -
 (W1-2) Double sharp curve first to right
 -
 (W1-3) Curve to left
 -
 (W1-3) Curve to right
 -
 (W1-4) Double curve first to left
 -
 (W1-4) Double curve first to right
 -
 (W1-5) Winding road first to left
 -
 (W1-5) Winding road first to right
 -
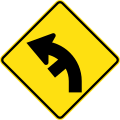
 (W1-7) Hairpin curve to left
 -
 (W1-7) Hairpin curve to right
 -
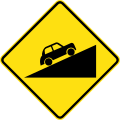
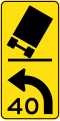 (W1-8) Tilting Truck (left)
 -
 (W1-8) Tilting Truck (right)
 -
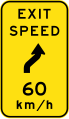
 (W1-9-1) Exit advisory speed
 -
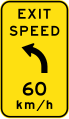 (W1-9-2) Exit advisory speed with curve to left
 -
 (W1-9-2) Exit advisory speed with curve to right
 -
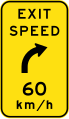
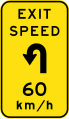
 (W1-9-3) Exit advisory speed with turn to left
 -
 (W1-9-3) Exit advisory speed with turn to right
 -
 (W1-9-4) Exit advisory speed with reverse curve, first to left
 -
 (W1-9-4) Exit advisory speed with reverse curve, first to right
 -
 (W1-9-5) Exit advisory speed with hairpin curve to left
 -
 (W1-9-5) Exit advisory speed with hairpin curve to right
 -
 (W1-V50) Spiral loop (used in Victoria)
 -
 (W2-1) Crossroad intersection
 -
 (W2-3) T-junction
 -
 (W2-4) Side road intersection from left
 -
 (W2-4) Side road intersection from right
 -
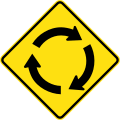 (W2-7) Roundabout Ahead
 -
 (W2-8) Staggered side road intersection, first from left
 -
 (W2-8) Staggered side road intersection, first from right
 -
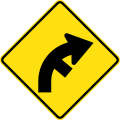
 (W2-9) Side road intersection from right on a curve to left
 -
 (W2-9) Side road intersection from left on a curve to right
 -
 (W2-10) Side road intersection from left on a curve to left
 -
 (W2-10) Side road intersection from right on a curve to right
 -
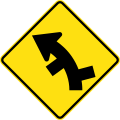 (W2-11) Staggered side road intersection, first from right on a curve to left
 -
 (W2-11) Staggered side road intersection, first from left on a curve to right
 -
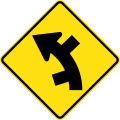 (W2-12) Staggered side road intersection, first from left on a curve to left
 -
 (W2-12) Staggered side road intersection, first from right on a curve to right
 -
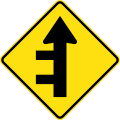 (W2-13) Double side road intersections from left
 -
 (W2-13) Double side road intersections from right
 -
 (W2-14) T-junction beyond a curve to left
 -
 (W2-14) T-junction beyond a curve to right
 -
 (W2-15) Crossroad intersection on a curve to left
 -
 (W2-15) Crossroad intersection on a curve to right
 -
 (W2-16) Side road intersection, entering straight ahead on a curve to left
 -
 (W2-16) Side road intersection, entering straight ahead on a curve to right
 -
 (W2-V104) Crossroad intersection on a curve to left (used in Victoria)
 -
 (W2-V104) Crossroad intersection on a curve to right (used in Victoria)
 -
 (W2-V112-1) T-junction at dual carriageway (used in Victoria)
 -
 (W2-V112-1) Crossroad intersection at dual carriageway (used in Victoria)
 -
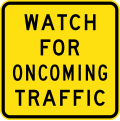 (W2-V116) Watch for Oncoming Traffic (used in Victoria)
 -
 (W2-208) Priority crossroad intersection (used in New South Wales)
 -
 (W2-209) Priority side road intersection from left (used in New South Wales)
 -
 (W2-209) Priority side road intersection from right (used in New South Wales)
 -
 (W3-1) Stop Sign ahead
 -
 (W3-2) Give Way Sign ahead
 -
 (W3-3) Traffic Lights ahead
 -
 (W3-3) Pedestrian Lights ahead
 -
 (W3-4) Speed Hump Ahead
 -
 (W3-V101) Traffic Light ahead (Prepare to Stop) (used with the warning sign for signals ahead) (used in Victoria, Queensland and Western Australia)
 -
 (W3-Q01) Ramp Metering (or Roundabout Metering) Signals ahead (used in Queensland)
 -
 (MR-WDAD-2) Speed Limit Ahead (used in Western Australia)
 -
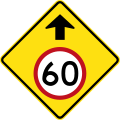
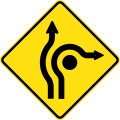
 (MR-WDAD-5) Roundabout Directional Lanes (used in Western Australia and Darwin, Northern Territory)
 -
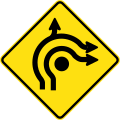
 (MR-WDAD-6) Roundabout Directional Lanes (used in Western Australia and Darwin, Northern Territory)
 -
 (MR-WDAD-7) Roundabout Directional Lanes (used in Western Australia)
 -
 (MR-WDAD-8) Roundabout Directional Lanes (used in Western Australia)
 -
 (MR-WDAD-9) Roundabout Directional Lanes (used in Western Australia)
 -
 (MR-WDAD-10) Roundabout Directional Lanes (used in Western Australia)
 -
 (MR-WDAD-11) Lane Allocation (used in Western Australia)
 -
 (MR-WDAD-12) Roundabout Directional Lanes (used in Western Australia)
 -
 (MR-WDAD-13) Roundabout Directional Lanes (used in Western Australia)
 -
 (MR-WDAD-14) Roundabout Directional Lanes (used in Western Australia)
 -
 (MR-WDAD-15) Roundabout Directional Lanes (used in Western Australia)
 -
 (MR-WDAD-16) Roundabout Directional Lanes (used in Western Australia)
 -
 (MR-WDAD-17) Roundabout Directional Lanes (used in Western Australia)
 -
 (MR-WDAD-18) Roundabout Directional Lanes (used in Western Australia)
 -
 (MR-WDAD-19) Roundabout Directional Lanes (used in Western Australia)
 -
 (MR-WDAD-21) Trucks Prohibited Entry (used in Western Australia)
 -
 (MR-WDAD-23) Trucks Prohibited Entry Ahead (used in Western Australia)
 -
 (W4-1) Narrow Bridge
 -
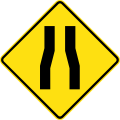 (W4-3) Road Narrows
 -
 (W4-4) Divided Road
 -
 (W4-5) Island
 -
 (W4-6) End Divided Road
 -
 (W4-8) Low Clearance ahead
 -
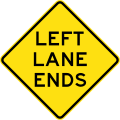 (W4-9) Left Lane Ends
 -
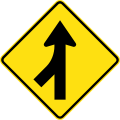
 (W4-10) Lane Allocation ahead (Three-way traffic)
 -
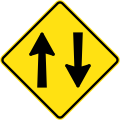 (W4-11) Two-way Traffic ahead
 -
 (W4-V101) Lane Allocation ahead (Right lane goes straight ahead or turn right) (used in Victoria)
 -
 (W4-V102) Lane Allocation ahead (Four-way traffic) (used in Victoria)
 -
 (W4-V106) Low Tree Branches (used in Victoria)
 -
 (W4-211) Clearance ahead (used in New South Wales)
 -
 (W4-Q01) S-lane (Sign placed before the lane ends) (used in Queensland)
 -
 (W5-1) Ferry
 -
 (W5-2) Opening Bridge
 -
 (W5-6) Ford
 -
 (W5-7-1) Floodway
 -
 (W5-7-2) Floodways
 -
 (W5-8) Low Level Bridge
 -
 (W5-9) Dip
 -
 (W5-10) Road Bump
 -
 (W5-11) Crest
 -
 (W5-12) Steep Descent
 -
 (W5-13) Steep ascent
 -
 (W5-14) Gate
 -
 (W5-16) Grid
 -
 (W5-18) Road Ends
 -
 (W5-19) Gravel Road
 -
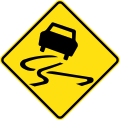 (W5-20) Slippery Road when wet
 -
 (W5-22) Trucks Crossing or Entering
 -
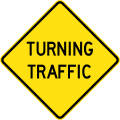 (W5-25) Turning Traffic
 -
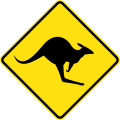 (W5-29) Kangaroos
 -
 (W5-30) Aircraft
 -
 (W5-31) Safety Ramp Crossing
 -
 (W5-33) Slow Point
 -
 (W5-34) Merging Traffic (left)
 -
 (W5-34) Merging Traffic (right)
 -
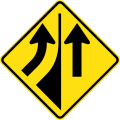 (W5-35) Added Lane (left)
 -
 (W5-35) Added Lane (right)
 -
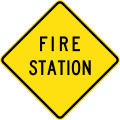 (W5-36) Fire Station
 -
 (W5-37) Ambulance Station
 -
 (W5-38) Stock Crossing
 -
 (W5-41) Tram Crossing
 -
 (W5-42) Falling Rocks (left)
 -
 (W5-42) Falling Rocks (right)
 -
 (W5-43) Uneven Surface
 -
 (W5-44) Camels crossing
 -
 (W5-45) Emus crossing
 -
 (W5-46) Wild Horses Crossing
 -
 (W5-47) Koalas Crossing
 -
 (W5-48) Wombats Crossing
 -
 (W5-49) Wild Animals
 -
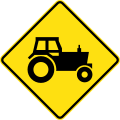 (W5-50) Farm Machinery
 -
 (W5-SA63) Cattle (used in South Australia)
 -
 (W5-SA70) Emergency Vehicles (used in South Australia)
 -
 (W5-SA72) Tilting truck from the left (used in South Australia)
 -
 (W5-SA72) Tilting truck from the right (used in South Australia)
 -
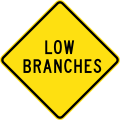 (W5-SA74) Low Branches (used in South Australia)
 -
 (W5-SA75) Forklifts (used in South Australia)
 -
 (W5-SA101) Cross Wind (used in South Australia)
 -
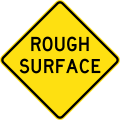 (W5-V102) Rough Surface (used in Victoria)
 -
 (W5-SA106) Wildlife on Road (used in South Australia)
 -
 (W5-V106) Strong Cross Wind (used in Victoria)
 -
 (W5-SA109) Creek (used in South Australia)
 -
 (W5-V109) High Risk Area (used in Victoria)
 -
 (W5-SA110) Creeks (used in South Australia)
 -
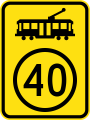 (W5-V110) Tram Speed (used in Victoria and Gold Coast, Queensland)
 -
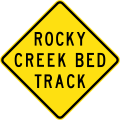 (W5-SA111) Rocky Creek Bed Track (used in South Australia)
 -
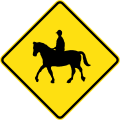 (W5-V111) Equestrians (used in Victoria)
 -
 (W5-SA112) Wildlife (used in South Australia)
 -
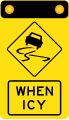 (W5-V116) Slippery When Icy (used in Victoria)
 -
 (W5-V120) Wildlife Crossing (used in Victoria)
 -
 (W5-V121) Emergency Vehicles (used in Victoria)
 -
 (W5-V122) Fire Station (Prepare to Stop) (used in Victoria)
 -
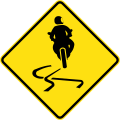 (W5-V123) Slippery for Motorcycles (used in Victoria)
 -
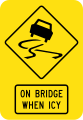 (W5-V129) Slippery Road on Bridge When Icy (used in Victoria)
 -
 (W5-V130) Rumble Strips (used in Victoria)
 -
 (W5-V131) Stock Crossing Ahead (used in Victoria)
 -
 (W5-V132) Falling Rocks (left) (used in Victoria)
 -
 (W5-V132) Falling Rocks (right) (used in Victoria)
 -
 (W5-V134) Deer (used in Victoria)
 -
 (W5-204) Falling Rocks (used in New South Wales)
 -
 (W5-226) Wind Gusts (used in New South Wales)
 -
 (W5-232) Buses Turning (used in New South Wales)
 -
 (W5-Q01) Start of Cane Railway Crossings (used in Queensland)
 -
 (W5-Q02) End of Cane Railway Crossings (used in Queensland)
 -
 (W5-Q04) Drift Sand (used in Queensland)
 -
 (W5-Q05) Soft Edges (used in Queensland)
 -
 (W5-Q07) Cane Hauling Ahead (This flag is used with the guide sign sugar cane area.) (used in Queensland)
 -
 (W5-Q09) Rumble Strips (used in Queensland)
 -
 (W5-Q10) Unfenced Road (Watch for Wandering Animals) (used in Queensland)
 -
 (QLD-TC9866) Cassowary (used in Queensland)
 -
 (MR-WDO-1) Road Hump with Advisory Speed (used in Western Australia)
 -
 (MR-WDO-13) Strong Cross Winds (used in Western Australia)
 -
 (MR-WDO-14) Rumble Strip (used in Western Australia)
 -
 (W6-1) Pedestrians
 -
 (W6-2) Pedestrian Crossing Ahead
 -
 (W6-2) Pedestrian Crossing Ahead (with target board) (used in Queensland)
 -
 (W6-V2-1) Pedestrian Crossing Ahead on Side Road (veer left) (used in Victoria and Queensland)
 -
 (W6-V2-1) Pedestrian Crossing Ahead on Side Road (veer right) (used in Victoria)
 -
 (W6-V2-2) Pedestrian Crossing Ahead on Side Road (turn left) (used in Victoria and South Australia)
 -
 (W6-V2-2) Pedestrian Crossing Ahead on Side Road (turn right) (used in Victoria)
 -
 (W6-3) Children
 -
 (W6-3) Children (with target board) (used in Queensland)
 -
 (W6-3) Children (used in the Northern Territory)
 -
 (W6-4) School
 -
 (W6-4) School (with target board) (used in Queensland)
 -
 (W6-4) School (used in the Northern Territory)
 -
 (W6-7) Cyclists
 -
 (W6-8) Road Ahead
 -
 (W6-9) Pedestrians and Cyclists
 -
 (W6-V9-2) Pedestrians, Cyclists and Equestrians (used in Victoria)
 -
 (W6-V101) Cyclists (used in Victoria)
 -
 (W6-V103) Steep Descent for Cyclists (used in Victoria)
 -
 (W6-V104) Slippery for Cyclists (used in Victoria)
 -
 (W6-V105) Pedestrian, Cyclist and Equestrian Crossing Ahead (used in Victoria)
 -
 (W6-SA106) School Zone (used in South Australia)
 -
 (W6-V106) School Bus Stop Ahead (used in Victoria)
 -
 (W6-216-ACT) School Zone (used in the Australian Capital Territory)
 -
 (W6-Q01) National Trail (used in Queensland)
 -
 (W6-Q02) National Trail Road Crossing (used in Queensland)
 -
 (W7-2) Number of Tracks
 -
 (W7-4) Railway Level Crossing with Flashing Signals ahead
 -
 (W7-7) Railway Level Crossing ahead (left)
 -
 (W7-7) Railway Level Crossing ahead (right)
 -
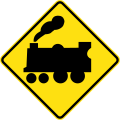
 (W7-8) Railway Level Crossing on Road ahead
 -
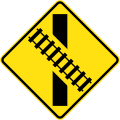
 (W7-9) Railway Level Crossing on Road ahead (skewed) (left)
 -
 (W7-9) Railway Level Crossing on Road ahead (skewed) (right)
 -
 (W7-12) Railway Level Crossing on Side Road (left)
 -
 (W7-12) Railway Level Crossing on Side Road (right)
 -
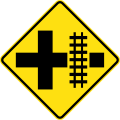
 (W7-13) Railway Level Crossing on Crossroad (left)
 -
 (W7-13) Railway Level Crossing on Crossroad (right)
 -
 (W7-15) Railway Gate
 -
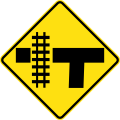 (W7-13) Railway Level Crossing on T-junction (left)
 -
 (W7-13) Railway Level Crossing on T-junction (right)
 -
 (W8-2) Advisory Speed
 -
 (W8-3) On Side Road (left)
 -
 (W8-3) On Side Road (right)
 -
 (W8-5) Metre plate
 -
 (W8-V6) Kilometre plate (used in Victoria)
 -
 (W8-8) When Wet
 -
 (W8-8) When Frosty
 -
 (W8-9) Under Snow
 -
 (W8-13) Playground
 -
 (W8-14) School
 -
 (W8-14) School (used in the Northern Territory)
 -
 (W8-15) Merge Right
 -
 (W8-16) One Lane
 -
 (W8-17-1) Distance (in kilometres)
 -
 (W8-17-2) Distance (in metres 250)
 -
 (W8-18) Aged
 -
 (W8-19) Blind
 -
 (W8-20) Disabled
 -
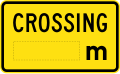
 (W8-22) Crossing Ahead
 -
 (W8-23) Crossing Arrows
 -
 (W8-24) Preschool
 -
 (W8-25) Refuge Island
 -
 (W8-24) Preschool (used in the Northern Territory)
 -
 (W8-26) Added Lane
 -
 (W8-27) Prepare to Stop
 -
 (W8-28) Crossing Ramp
 -
 (W8-29) On Bridge When Frosty
 -
 (W8-SA54) Over Crest (used in South Australia)
 -
 (W8-SA55) Mud on Road (used in South Australia)
 -
 (W8-SA56) School Bus (used in South Australia)
 -
 (W8-SA62) Watch for Road Trains (used in South Australia)
 -
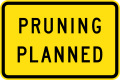 (W8-SA64) Prunning Planned (used in South Australia)
 -
 (W8-SA65) On Green Signal (used in South Australia)
 -
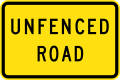 (W8-SA102) Unfenced Road (used in South Australia)
 -
 (W8-V106) Crossing Ahead (used in Victoria)
 -
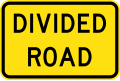 (W8-V107) Divided Road (used in Victoria)
 -
 (W8-V112) Narrow Shoulder on Bridge (used in Victoria)
 -
 (W8-V116) Trucks use Low Gear (used in Victoria)
 -
 (W8-V118) When Icy (used in Victoria)
 -
 (W8-V121) Advisory Speed (used in Victoria)
 -
 (W8-V122) On Bridge When Icy (used in Victoria)
 -
 (W8-208) Limited Width Warning (used in New South Wales)
 -
 (W8-212) High Wind Area (used in New South Wales)
 -
 (W8-Q01) Cane Railway (A railway is used by sugar cane trains) (This warning sign is only used with Railway Level Crossing ahead) (used in Queensland)
 -
 (W8-Q02) Crossing Ahead (used in Queensland)
 -
 (W8-Q03) Bus Stop (used in Queensland)
 -
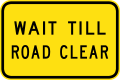 (W8-Q05) Wait Till Road Clear (used in Queensland)
 -
 (W8-Q06) Watch for Traffic (used in Queensland)
 -
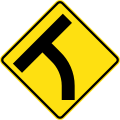
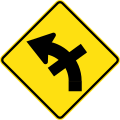
 (W9-1) Modified side road intersection (left)
 -
 (W9-1) Modified side road intersection (right)
 -
 (W9-2) Modified T-junction (left)
 -
 (W9-2) Modified T-junction (right)
 -
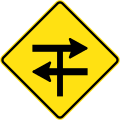
 (W9-3) Modified crossroad intersection (left)
 -
 (W9-3) Modified crossroad intersection (right)


Guide and information signs edit
Guide and information signs give directions and information for scenic tourist routes and destinations such as rest stops and fuel stations. They also provide additional traffic information to guide driving.
-
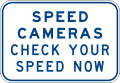 (G6-254) Speed Cameras Check Your Speed Now (used in New South Wales)
 -
 (G6-327-1) Speed Camera (24 Hours) (Speed Limit) (used in New South Wales)
 -
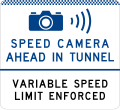
 (G6-327-2) Speed Camera (24 Hours) (Variable Speed Limit Enforced) (used in New South Wales)
 -
 (G6-327-3) Speed Camera (24 Hours) (Speed Limits per Category) (used in New South Wales)
 -
 (G6-328-1) Speed Camera Ahead (Speed Limit) (used in New South Wales)
 -
 (G6-328-2) Speed Camera Ahead (Variable Speed Limit Enforced) (used in New South Wales)
 -
 (G6-328-5) Speed Camera Ahead (Speed Limits per Category) (used in New South Wales)
 -
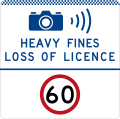 (G6-329-1) Speed Camera (Heavy Fines Loss of Licence) (Speed Limit) (used in New South Wales)
 -
 (G6-329-2) Speed Camera (Heavy Fines Loss of Licence) (Variable Speed Limit Enforced) (used in New South Wales)
 -
 (G6-329-3) Speed Camera (Heavy Fines Loss of Licence) (Speed Limits per Category) (used in New South Wales)
 -
 (G6-330-1) Speed Camera in Tunnel Ahead (Speed Limit) (used in New South Wales)
 -
 (G6-330-2) Speed Camera in Tunnel Ahead (Variable Speed Limit Enforced) (used in New South Wales)
 -
 (G6-331-1) Speed Camera in Tunnel (24 Hours) (Speed Limit) (used in New South Wales)
 -
 (G6-331-2) Speed Camera in Tunnel (24 Hours) (Variable Speed Limit Enforced) (used in New South Wales)
 -
 (P2-V100) Speed & Red Light Cameras Operate Throughout Victoria (used in Victoria)
 -
 (P2-V105) Speed Cameras Used In Construction Zones (used in Victoria)
 -
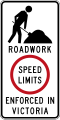 (P2-V106) Roadwork Speed Limits Enforced In Victoria (used in Victoria)
 -
 (P2-V111-2) Road Safety Cameras Operate In This Area (used in Victoria)
 -
 (G6-332) School Zone Ahead (used in New South Wales)
 -
 (G9-9) Reduce Speed
 -
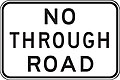 (G9-11) No Through Road
 -
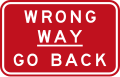 (G9-69) Wrong Way - Go Back
 -
 (G9-79) 10 km/h Speed Limit Ahead
 -
 (G9-79) 20 km/h Speed Limit Ahead
 -
 (G9-79) 25 km/h Speed Limit Ahead
 -
 (G9-79) 30 km/h Speed Limit Ahead
 -
 (G9-79) 40 km/h Speed Limit Ahead
 -
 (G9-79) 50 km/h Speed Limit Ahead
 -
 (G9-79) 60 km/h Speed Limit Ahead
 -
 (G9-79) 70 km/h Speed Limit Ahead
 -
 (G9-79) 80 km/h Speed Limit Ahead
 -
 (G9-79) 90 km/h Speed Limit Ahead
 -
 (G9-79) 100 km/h Speed Limit Ahead
 -
 (G9-79) 110 km/h Speed Limit Ahead
 -
 (G9-82) Steep Descent
 -
 (G9-83) Long Steep Descent
 -
 (G9-V113-1) Sections of This Road Are Subject to Frost, Ice, Snow; Drive Slowly (used in Victoria)
 -
 (G9-V170) Drive On Left In Australia (Placed in areas with high tourist traffic, such as roadways near airports) (used in Victoria and Queensland)
 -
 (G9-375) Speed Limit during Non-School Zone times (used in New South Wales)
 -
 (G9-380) Speed Limits Enforced (used in New South Wales)


Guide and information signs on expressways edit
-
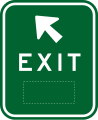
 (GE2-3) Exit
 -
 (GE2-4) Exit (with supplementary number)
 -
 (GE6-9) End Freeway 2 km
 -
 (GE6-10) End Freeway 1 km
 -
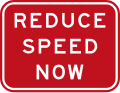 (GE9-3) Reduce Speed Now
 -
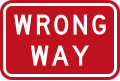 (GE9-15) Wrong Way
 -
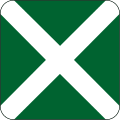 (GE9-23) Emergency Median Crossing


Route shields edit
Please note that some plates have reduced due to the changing to alphanumeric plates in several states. Queensland has been partially alphanumeric, replacing all but around one metroad (because it is not applicable as M) with M roads, while New South Wales also had metroads but they were all replaced with straight alphanumeric plates along with national roads. Victoria is alphanumeric but partially numeric in the metropolitan area of Melbourne.
-
 National highway shield
 -
 National alphanumeric highway shield
 -
 National route shield
 -
 Alternative national route shield
 -
 State route shield
 -
 State route shield (toll road)
 -
 Metroad marker (used in Brisbane, Queensland)
 -
 Tourist drive shield
 -
 Alphanumeric route shield
 -

-
 Alphanumeric route shield (toll road)
 -
 Alphanumeric detour route shield (used in Sydney, New South Wales)
 -
 Alphanumeric ring road route shield (used in Adelaide, South Australia)
 -
 Alphanumeric route shield (used in the Australian Capital Territory)
 -
 Alphanumeric route shield (used on motorways in the Australian Capital Territory
 -
 Alternative alphanumeric route shield (used in Queensland)


Hazard markers edit
Hazard markers indicate the direction to take when approaching the obstacle or driving past the hazard. Drivers must obey these signs.
-
 (D4-1-1) Left curve marker (used at curves or roundabouts)
 -
 (D4-1-1) Right Curve marker (used at curves)
 -
 (D4-1-1-Q01) Left curve marker (used at curves in Queensland)
 -
 (D4-1-1-Q01) Right curve marker (used at curves in Queensland)
 -
 (D4-1-2) Island curve marker (left)
 -
 (D4-1-2) Island curve marker (right)
 -
 (D4-2-2) Pass either side Chevron
 -
 (D4-2-2-Q01) Pass either side (used in Queensland)
 -
 (D4-2-3) End of road Curve marker (used at T-junctions)
 -
 (D4-2-3) End of road curve marker (double, used at T-junctions)
 -
 (D4-3) Narrow marker (left)
 -
 (D4-3) Narrow marker (right)
 -
 (D4-6) Curve marker (left)
 -
 (D4-6) Curve marker (right)
 -
 (D4-V105) Pass either side (used in Victoria)
 -
 End of road Curve marker (used at T-junctions in Victoria)
 -
 (D4-V110) Curve marker with Advisory Speed (left, used in Victoria)
 -
 (D4-V110) Curve marker with Advisory Speed (right, used in Victoria and Queensland)


Roadwork signs edit
Roadwork signs to keep you informed of changing conditions and to keep road workers safe. These signs closely follow United Kingdom design.
-
 (T1-1) Roadwork Ahead
 -
 (T1-3-1) Road Plant Ahead
 -
 (T1-5) Workers Ahead
 -
 (T1-10) Traffic Hazard
 -
 (T1-16) Roadwork 1 km ahead
 -
 (T1-18) Prepare to Stop
 -
 (T1-30) Traffic Lights
 -
 (T1-31) Roadwork Ahead
 -
 (T1-SA109) Speed Limit Changed (used in South Australia)
 -
 (T2-6-1) Lane Status
 -
 (T2-6-2) Lane Status
 -
 (T2-16) End Roadwork
 -
 (T2-17) End Roadwork
 -
 (T3-3) Slippery road when wet
 -
 (T3-9) Loose Gravel
 -
 (T4-216N) Roadwork Speed Limits Enforced (used in New South Wales)
 -
 (T7-1) Slow


Fire danger rating signs edit
-
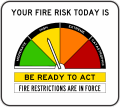 A manually controlled Fire Danger Rating Sign new system since 2022
 -
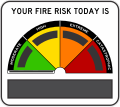 An electronically controlled Fire Danger Rating Sign new system since 2022


Traffic lights edit
For traffic edit
-
 Standard
 -
 Turn left
 -
 Turn right
 -
 Standard (with green and yellow turn left)
 -
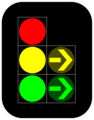 Standard (with green and yellow turn right)
 -
 Flashing white walking man (give way to pedestrians) (used in South Australia)
 -
 Bicycles


For crosswalk edit
-
 Red - don't start cross
 -
 Green - start cross with care
 -
 Flashing red - don't start to cross
 -
 Countdown (without flashing red)
 -
 Countdown (with flashing red)


For special vehicles edit
The traffic lights for special vehicles have a letter on it. The GO light is white instead of green.
-
 T - trams
 -
 B - buses
 -
 E - emergency vehicles


Road markings edit
Raised markers edit
Australia specifies four colours of raised markers:[8]
- White: The default colour for lane lines.
- Red: The colour used to augment the left hand edge lines.
- Yellow: Augments the dividing lines, right-hand edge lines of one-way carriageways, the outline of traffic islands and on painted medians.
- Blue: Used to mark the location of a fire hydrant.
Retired signs edit
-
 Old version of Give Way (1964-1974)
 -
 Give Way to Right (1970-1979)
 -
 Old version of No Entry
 -
 Old version of Two-way Traffic
 -
 (R3-1) Pedestrian Crossing (1989-2000)
 -
 (R3-2) Safety Zone (1964-2000) (excluding the Australian Capital Territory and New South Wales)
 -
 (R3-209) School Zone (used in New South Wales)
 -
 (R3-209-1) School Zone (used in New South Wales)
 -
 Old version of Speed Limit (before metrication in 1974)
 -
 Old version of Speed Derestriction (before metrication in 1974)
 -
 Old version of Speed Limit Ends (before metrication in 1974)
 -
 (R4-V105) 40 km/h Speed Limit School Zone (used in Victoria)
 -
 (R4-V105) 60 km/h Speed Limit School Zone (used in Victoria)
 -
 (R4-V106) 40 km/h Speed Limit School Zone (used in Victoria)
 -
 (R4-V106) 60 km/h Speed Limit School Zone (used in Victoria)
 -
 (R4-231-1) End School Zone (used in New South Wales) (return to open Speed Limit)
 -
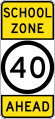 (R4-234) School Zone Ahead (used in New South Wales)
 -
 (R5-420) No Standing (used in New South Wales)
 -
 (R5-440) No Parking (used in New South Wales)
 -
 (R9-V108) School Times (used in Victoria)
 -
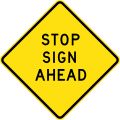 (W3-1) Stop Sign Ahead (1964-1989)
 -
 (W3-2) Give Way Sign Ahead (1964-1989)
 -
 (W3-3) Traffic Lights Ahead (1964-1995)
 -
 (W3-201) Stop Sign ahead (used in New South Wales)
 -
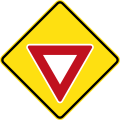 (W3-202) Give Way Sign ahead (used in New South Wales)
 -
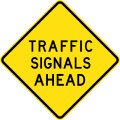 (W3-203) Traffic Signals ahead (used in New South Wales)
 -
 (W4-11) Two-way Traffic ahead (1964-1974)
 -
 (W5-V112) Wombats (used in Victoria)
 -
 (W5-224) Koalas (used in New South Wales)
 -
 (W5-Q08) Koalas (used in Queensland)
 -
 (W6-1) Pedestrians (1989-2009)
 -
 (W6-1) Pedestrians (1964-1989)
 -
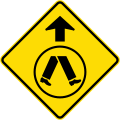 Old version of Pedestrian Crossing Ahead
 -
 (W6-3) Children (1974-2009)
 -
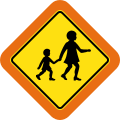 (W6-3) Children (with target board) (1998-2009) (used in Queensland)
 -
 (W6-4) School (1964-2009)
 -
 (W6-4) School (with target board) (1998-2009) (used in Queensland)
 -
 (W6-7) Cyclists (1989-2017)
 -
 (W6-201) Aged Pedestrians (used in New South Wales)
 -
 (W6-202) Spastic Pedestrians (used in New South Wales)
 -
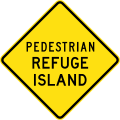 (W6-206) Pedestrian Refuge Island (used in New South Wales)
 -
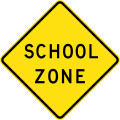 (W6-216) School Zone (used in New South Wales)
 -
 (MR-WDP-1) Children (used in Western Australia)
 -
 (MR-WDP-2) School (used in Western Australia)
 -
 (MR-WDP-4) Blind Pedestrians (used in Western Australia)
 -
 (W7-3) Rail Crossing (1974-2009)
 -
 (W8-1) Warning Triangle (1964-2009)
 -
 Old version of Playground
 -
 Old version of School
 -
 Old version of Blind
 -
 Old version of Disabled
 -
 Boggy When Wet
 -
 Old version of Crossing Ahead
 -
 Old version of Preschool
 -
 Old version of Refuge Island
 -
 (W9-4) Intersection at a curve (left) (1998-2009)
 -
 (W9-4) Intersection at a curve (right) (1998-2009)
 -
 (R4-V108) 40 km/h Speed Limit Ahead (used in Victoria)
 -
 (R4-V108) 50 km/h Speed Limit Ahead (used in Victoria)
 -
 (R4-V108) 60 km/h Speed Limit Ahead (used in Victoria)
 -
 (R4-V108) 70 km/h Speed Limit Ahead (used in Victoria)
 -
 (R4-V108) 80 km/h Speed Limit Ahead (used in Victoria)
 -
 (QLD-TC2323-1) Coronavirus Quarantine (2020-2022) (used in Queensland)
 -
 (QLD-TC2323-2) Coronavirus Quarantine (2020-2022) (used in Queensland)
 -
 (QLD-TC2334) Community Closed Ahead (2020-2022) (used in Queensland)
 -
 (QLD-TC2335) Essential Travel Only (2020-2022) (used in Queensland)
 -
 (QLD-TC2336) Coronavirus Quarantine Border Control Point Ahead (2020-2022) (used in Queensland)
 -
 (QLD-TC2337) Border Closed 1 km Ahead (2020-2022) (used in Queensland)
 -
 (QLD-TC2338) Border Control Point (2020-2022) (used in Queensland)
 -
 (QLD-TC2339) Coronavirus Quarantine Border Control Point Stop Where Directed (2020-2022) (used in Queensland)
 -
 (QLD-TC2341) Border Closed Ahead (2020-2022) (used in Queensland)


Retired combo signs edit
-
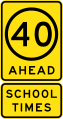 (R4-V108) 40 km/h Speed Limit Ahead (School Times) (used in Victoria)
 -
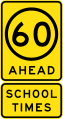 (R4-V108) 60 km/h Speed Limit Ahead (School Times) (used in Victoria)


Retired route shields edit
-
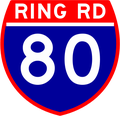 Ring road route shield (used in Victoria)
 -
 Freeway route shield (used in New South Wales)
 -
 Freeway route shield (used in Melbourne, Victoria)
 -
 Freeway route shield (used in Brisbane, Queensland)
 -
 Tourist Drive route shield (used in Canberra, Australian Capital Territory)


Early road signs edit
-
 Early version of Halt (1940s-1959)
 -
 Early version of Stop (1960-1964)
 -
 Early version of Slow (octagon)
 -
 Early version of Slow (circular)
 -
 Early version of Give Way (1940s-1964)
 -
 Early version of No Turn To Left
 -
 Early version of No Turn To Right
 -
 Early version of Speed
 -
 Early version of Derestriction
 -
 Early version of School
 -
 Early version of Hospital


Retired traffic lights edit
-
 Worded version of walk/don't walk signal

References edit
- ^ Australian Road Rules (PDF) (Report). Parliamentary Counsel’s Committee. 3 September 2018.
- ^ Smith, Ryan (27 July 2012), No Standing Between Notices, retrieved 11 September 2022
- ^ Smith, Ryan (14 July 2012), Vintage RACV Royalauto scan, retrieved 11 September 2022
- ^ Manual of Uniform Traffic Control Devices (3rd ed.). United States: AASHTO/FHWA. 1948.
- ^ a b c d "Motoring Goes Metric" (PDF). Pamphlet. Metric Conversion Board. 1974.
- ^ Metric conversion ad - 1974, retrieved 11 September 2022
- ^ "Regulatory signs". Queensland Government. Retrieved 16 August 2016.
- ^ Roads and Waterways – Transport for NSW. "Delineation Section 15 Raised Pavement Markers" (PDF). Delineation Section 15 Raised Pavement Markers. Retrieved 19 September 2022.